In the bustling city of Dubai, every corner of a home or business reflects the owner’s style and taste. One element that often takes center stage is the flooring. Among various flooring options, epoxy flooring stands out due to its durability, resistance, and aesthetic appeal.
If you are a hands-on person considering a DIY approach, our detailed guide will walk you through the DIY epoxy flooring installation procedure step by step.
Understanding Epoxy Flooring
Epoxy flooring is a unique floor material that has steadily gained popularity. Epoxy is a thermosetting resin that is applied as a coating. It is formed when you mix one part of an epoxy resin with one part of a polyamine hardener. The hardener acts as a catalyst and gives the flooring its strength. It does not harden by drying like water-based paint but through a chemical reaction between the resin and hardener.
an Ultra-Thin Overlay is a very thin layer that is put on top of something to protect or improve it. think of it like a super skinny cover for a book or a phone screen.
Benefits of Epoxy Flooring
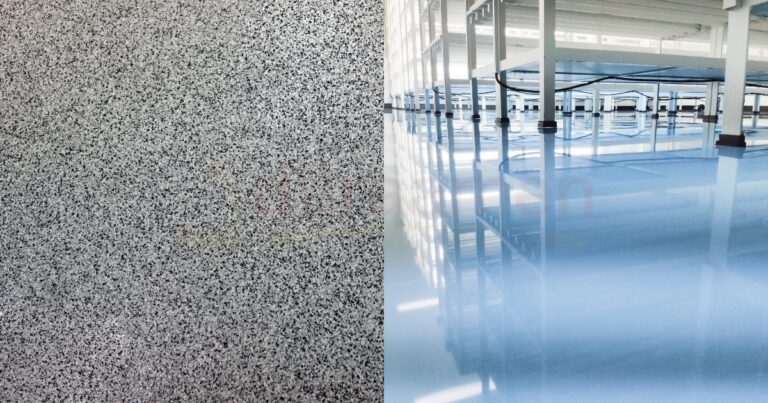
Before discussing the installation process, it is essential to comprehend why epoxy flooring is an excellent option for your space. Epoxy flooring offers a high-gloss, durable surface that can withstand heavy and continuous traffic. It is chemical-resistant and ideal for warehouses, garages, or industrial applications. Also, it creates a seamless surface that can last many years and be easily wiped clean.
Materials and Tools You Will Need
You’ll need the right tools and materials for a successful DIY epoxy flooring installation. Here’s a checklist to help you prepare:
- Epoxy floor coating kit (make sure it includes both resin and hardener)
- Power washer or scrub brush
- Broom and dustpan
- Vacuum cleaner
- Degreaser or cleaning solvent
-
Acid etching solution - Nylon brushes
- Squeegee
- Roller brush and extension handle
- Paintbrush
- Safety gear: gloves, goggles, and a mask
- A reliable source of water
Preparing Your Floor for Epoxy Coating
Before you begin the application, your concrete floor must be thoroughly cleaned and prepared. This step is crucial for the epoxy coating to adhere properly to the concrete surface.
Clean the Floor
Start by removing any surface dirt, dust, or residue with a broom and dustpan, followed by a thorough vacuum.
Degrease the Floor
Any oil or grease stains on the floor can prevent the epoxy from adhering correctly. Use a degreaser or cleaning solvent to remove these stains.
Etch the Floor
Etching provides the floor with texture, which helps the epoxy coating bond to the surface. Apply the acid etching solution per the manufacturer’s instructions, then rinse thoroughly and let it dry. The Epoxy Garage Floor Installation Guide is a step-by-step manual that helps you apply a strong, shiny coating to your garage floor. It’s like a recipe for making your garage floor look new and last longer!
Cost Analysis of Epoxy Flooring in Dubai: Service Selection Expectations is about figuring out how much it costs to get shiny, strong epoxy floors in Dubai and what to look for when choosing a service. 2024 Update: Current Epoxy Flooring Styles in UAE are all about glossy, durable floors with creative designs that are easy to clean and maintain. They are popular in homes, offices, and public spaces.
Setting Up Self-Leveling Epoxy on Plywood or Cement Board is like spreading a thick, smooth layer of syrup on a pancake. It helps to make the surface flat and shiny.
Applying the Epoxy Floor Coating
Now that your floor is prepared, it’s time to mix your epoxy. Follow the manufacturer’s instructions, as this process can vary. Once your epoxy is mixed, you can start the application process.
Apply the First Coat
Apply epoxy along the room’s perimeter, beginning in one corner, using a paintbrush. Use a roller to apply the epoxy on the rest of the floor. Work in small sections and apply the coating in a “W” pattern for even coverage.
Let it Dry
Allow the first coat to dry thoroughly. Time required varies widely from chemical to chemical and environment to environment, but typically ranges from 12 to 24 hours.
Apply the Second Coat
After the first coat has thoroughly dried, apply a second coat of epoxy. This additional layer will provide extra durability and a more professional finish. Follow the same process as with the first coat, starting from the edges and working your way inward.
Let it Cure
Allow the second coat to cure. This process is longer than simple drying—it involves the hardening of the epoxy through chemical reactions. Timeframes for this vary widely from product to product. During this time, avoid walking on or placing anything on the floor.
Finishing Touches
Once the floor is completely cured, consider adding a clear topcoat for protection and gloss. This is not required, but it can help your epoxy floor last even longer and stand up to more wear and tear.
Maintenance of Epoxy Flooring
Epoxy flooring is low maintenance, but proper care can extend its lifespan and keep it looking its best. Regularly sweep the floor to remove dust and debris. For spills, use a mild detergent and water, then rinse thoroughly. Avoid using harsh chemicals that could damage the epoxy.
Safety Considerations
When introducing epoxy floors to your space through a DIY installation, safety should always be your priority. This involves protecting yourself by donning gloves, eye protection, and a face shield.
Although extremely durable and aesthetically pleasing, epoxy flooring can emit strong fumes during application and curing. Therefore, it is critical to ensure your work area is well-ventilated throughout the process. By taking these precautions, you can safely and effectively install your new epoxy floors.
Epoxy flooring is an attractive and durable option, and with the right preparation and application, you can successfully install it yourself. However, professional installation is always an option if you need clarification or if the project seems too large to handle on your own.
At Duraamen, we offer high-quality epoxy flooring solutions and professional installation services. We want to ensure that your flooring project goes as smoothly as possible.
Ready to transform your floor with a high-quality epoxy finish? We invite you to call us at Duraamen for more information or to schedule a consultation. Let our experts guide you through the process and ensure a seamless, professional installation.
