Introduction to Microtopping Repair
Understanding Microtopping and Its Uses
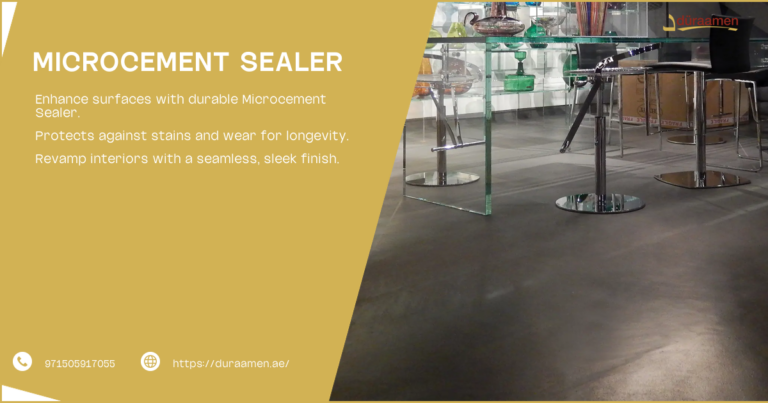
Microtopping is a versatile and durable surface coating used to rejuvenate old concrete floors, walls, and other surfaces. It provides a sleek, modern finish that can mimic the appearance of polished concrete, stone, or even wood. Microtopping is popular in both residential and commercial settings due to its aesthetic appeal and functional benefits.
- Versatility : Can be applied to various surfaces.
- Durability : Resistant to wear and tear.
- Aesthetic Appeal : Offers a range of finishes and colors.
The Importance of Proper Maintenance for Microtopping Surfaces
Proper maintenance is crucial for preserving the appearance and longevity of microtopping surfaces. Regular cleaning and timely repairs can prevent minor issues from escalating into major problems, ensuring that the surface remains attractive and functional for years.
- Longevity : Extends the life of the surface.
- Appearance : Maintains the aesthetic quality.
- Cost-Effective : Prevents costly repairs in the future.
How to Repair Microtopping: Identifying Common Issues
Recognizing Signs of Microtopping Damage
Identifying damage early is key to effective microtopping repair. Common signs of damage include cracks, chips, discoloration, and uneven surfaces. These issues can detract from the appearance and functionality of the microtopping.
- Cracks : Small or large fissures in the surface.
- Chips : Missing pieces of the microtopping.
- Discoloration : Changes in color or fading.
- Uneven Surfaces : Areas that are not level.
Diagnosing the Cause of Microtopping Problems
Understanding the root cause of microtopping issues is essential for effective repair. Causes can range from improper installation and environmental factors to heavy usage and lack of maintenance.
- Improper Installation : Poor application techniques.
- Environmental Factors : Exposure to moisture and temperature changes.
- Heavy Usage : High foot traffic or heavy loads.
- Lack of Maintenance : Neglecting regular cleaning and repairs.
Preparing for Microtopping Repair
Cleaning the Surface: Ensuring a Strong Bond
Before repairing microtopping, it’s essential to clean the surface thoroughly. This ensures that the repair materials bond effectively with the existing microtopping, resulting in a durable and seamless repair.
- Remove Debris : Sweep or vacuum the area.
- Clean with Mild Detergent : Use a gentle cleaner to remove dirt and grime.
- Rinse and Dry : Ensure the surface is completely dry before proceeding.
Assessing the Extent of Damage Before Repair
Evaluating the extent of the damage helps determine the appropriate repair method. Minor defects may require simple fixes, while significant damage might necessitate more extensive repairs or even overlaying.
- Visual Inspection : Look for visible signs of damage.
- Tap Test : Tap the surface to check for hollow areas.
- Measure Cracks : Determine the width and depth of cracks.
How to Repair Microtopping: Addressing Minor Defects 
Fixing Small Cracks and Chips in Microtopping
Small cracks and chips can be repaired using a microtopping repair kit. These kits typically include a patching compound that can be applied to the damaged area, followed by smoothing and blending to match the surrounding surface.
- Clean the Area : Remove any loose debris.
- Apply Patching Compound : Fill the crack or chip with the compound.
- Smooth and Blend : Use a trowel to smooth the surface.
Techniques for Repairing Minor Imperfections
Minor imperfections such as surface scratches or small blemishes can be addressed using a fine-grit sandpaper or a polishing pad. This helps to restore the smooth finish of the microtopping.
- Sand the Surface : Gently sand the affected area.
- Polish : Use a polishing pad to restore the shine.
- Seal : Apply a sealant to protect the repaired area.
How to Repair Microtopping: Solutions for Major Damage
Strategies for Overcoming Significant Microtopping Damage
For significant damage, more extensive repair methods are required. This may involve removing the damaged section and reapplying a new layer of microtopping. In some cases, an overlay might be necessary to achieve a uniform appearance.
- Remove Damaged Area : Cut out the damaged section.
- Reapply Microtopping : Apply a new layer of microtopping.
- Blend and Smooth : Ensure the new layer matches the existing surface.
When to Overlay vs. When to Repair: Making the Right Choice
Deciding whether to overlay or repair depends on the extent of the damage and the condition of the existing microtopping. Overlaying is suitable for widespread damage, while localized repairs are ideal for minor issues.
- Overlay : Suitable for extensive damage or wear.
- Repair : Ideal for localized defects.
- Consult a Professional : Seek expert advice for the best approach.
How to Repair Microtopping: Color and Aesthetic Considerations
Maintaining Color Consistency During Repairs
Maintaining color consistency is crucial for seamless repairs. Use color-matched repair materials and blend them carefully to ensure the repaired area matches the surrounding surface.
- Color-Matched Materials : Use materials that match the existing color.
- Blend Carefully : Ensure a smooth transition between old and new areas.
- Test First : Test the color on a small, inconspicuous area.
Dealing with Color Changes and Fading in Microtopping
Over time, microtopping can fade or change color due to exposure to sunlight and other environmental factors. Addressing these issues may involve reapplying a color stain or sealant to restore the original appearance.
- Reapply Color Stain : Use a stain to refresh the color.
- Seal the Surface : Apply a sealant to protect against future fading.
- Regular Maintenance : Clean and reseal periodically to maintain color.
How to Repair Microtopping: Advanced Repair Techniques
Utilizing Microtopping Stencils for Design Repairs
Microtopping stencils can be used to repair and enhance decorative designs. This technique involves applying a stencil over the damaged area and then reapplying the microtopping to recreate the original design.
- Choose a Stencil : Select a stencil that matches the existing design.
- Apply Microtopping : Use the stencil to guide the application.
- Remove Stencil : Carefully remove the stencil to reveal the design.
Leveling Techniques for Uneven Microtopping Surfaces
Uneven microtopping surfaces can be leveled using a self-leveling compound. This ensures a smooth and even finish, improving both the appearance and functionality of the surface.
- Prepare the Surface : Clean and prime the area.
- Apply Self-Leveling Compound : Pour the compound over the surface.
- Smooth and Level : Use a trowel to ensure an even finish.
How to Repair Microtopping: Preventing Future Issues 
Best Practices for Microtopping Maintenance
Regular maintenance is key to preventing future issues with microtopping. This includes routine cleaning, sealing, and addressing minor defects promptly to avoid more significant problems.
- Regular Cleaning : Sweep and mop regularly.
- Seal Periodically : Apply a sealant every few years.
- Address Defects Promptly : Fix minor issues before they worsen.
Avoiding Common Mistakes That Lead to Microtopping Damage
Avoiding common mistakes can help prolong the life of microtopping surfaces. This includes using the right cleaning products, avoiding heavy impacts, and ensuring proper installation techniques.
- Use Appropriate Cleaners : Avoid harsh chemicals.
- Prevent Heavy Impacts : Use protective pads under heavy furniture.
- Ensure Proper Installation : Follow manufacturer guidelines.
How to Repair Microtopping: Troubleshooting Specific Problems
Addressing Moisture-Related Microtopping Failures
Moisture can cause microtopping to delaminate or develop bubbles. Addressing moisture issues involves identifying the source of the moisture and ensuring proper drainage and sealing.
- Identify Moisture Source : Check for leaks or condensation.
- Improve Drainage : Ensure proper water runoff.
- Seal the Surface : Apply a moisture-resistant sealant.
Remedying Shadowing and Discoloration in Microtopping
Shadowing and discoloration can occur due to uneven application or exposure to sunlight. These issues can be remedied by reapplying a color stain or using a blending technique to even out the appearance. Microtopping kitchen surfaces are thin layers of special cement that can be applied over existing countertops to give them a new look Microtopping basement transformation can make old concrete floors look brand new It’s a thin layer of special cement that covers up cracks and stains in basements
Microtopping countertops upgraded offer a fresh look for kitchens and bathrooms This thin layer of cement-based material can transform old surfaces into modern masterpieces Microtopping patterns transform Thin layers of special concrete create cool designs on floors and walls
Microtopping garage renovation is a way to make old garage floors look new and smooth It uses a thin layer of special concrete to cover up cracks and stains in the garage Bathroom microtopping trends are making plain floors look fancy and new without much work People like using thin layers of special cement to give their bathrooms a smooth modern look
- Reapply Color Stain : Use a stain to even out the color.
- Blend the Surface : Use a blending technique to smooth transitions.
- Protect from Sunlight : Use UV-resistant sealants.
How to Repair Microtopping: FAQs
How to Repair Shrinkage Cracking in Microtopping?
Shrinkage cracking in microtopping can be repaired using a flexible patching compound. This compound fills the cracks and allows for slight movement, preventing further cracking.
How to Fix White Streaks in Microtopping?
White streaks in microtopping are often caused by efflorescence, a buildup of salts. These can be removed using a mild acid cleaner, followed by rinsing and sealing the surface to prevent recurrence.
What Causes Shadowing Through a Microtopping Overlay?
Shadowing through a microtopping overlay is typically caused by uneven application or differences in the underlying surface. Ensuring a uniform base and careful application can prevent this issue.
How to Address Moisture Causes in Microtopping Failure?
Moisture causes in microtopping failure can be addressed by identifying and eliminating the source of moisture. This may involve improving drainage, fixing leaks, and applying a moisture-resistant sealant.
Can Smooth-Finish Overlays Be Installed Over Broom-Finished Concrete?
Yes, smooth-finish overlays can be installed over broom-finished concrete. The surface must be properly prepared by cleaning and priming to ensure a strong bond between the overlay and the existing concrete.
How to Repair Microtopping: Final Thoughts
Emphasizing the Importance of Skilled Repair Techniques Skilled repair techniques are essential for maintaining the appearance and functionality of microtopping surfaces. Proper repairs can extend the life of the surface and prevent future issues.
The Role of Professional Expertise in Microtopping Repair While DIY repairs are possible for minor issues, significant damage or complex repairs may require professional expertise. Professionals have the knowledge and tools to ensure high-quality, long-lasting repairs.
