How to Install Microcement Over Tiles | Step-by-Step with Bob Harris
Microcement has become increasingly popular in modern interior design, offering a sleek and seamless finish for various surfaces. This versatile material can be applied over existing tiles, making it an excellent option for renovations. In this comprehensive guide, we’ll explore the process of installing microcement over tiles, with expert insights from Bob Harris, a renowned authority in the field.
What is Microcement?
Microcement is a thin, cement-based coating that can be applied to various surfaces, including tiles, concrete, and wood. Its versatility and durability make it an attractive option for homeowners and designers alike. Proper installation techniques are crucial to ensure a long-lasting and aesthetically pleasing result.
How to Install Microcement Over Tiles | Step-by-Step with Bob Harris
Before applying microcement over tiles, proper preparation is essential. This step ensures optimal adhesion and a smooth final result.
Cleaning and priming the tile surface
Thoroughly clean the existing tile surface to remove any dirt, grease, or debris. Use a degreasing agent and scrub the tiles to ensure a clean surface. Once clean, apply a suitable primer designed for use with microcement. This primer will enhance adhesion between the tiles and the microcement layers.
Necessary tools and materials
Gather all the required tools and materials before starting the installation process. This preparation will help streamline the application and ensure you have everything needed at hand.
- Microcement mixing bucket
- Electric mixer
- Trowels (various sizes)
- Sandpaper
- Protective gear (gloves, goggles, mask)
- Microcement base coat
- Microcement finish coat
- Primer
- Sealer
Application
The application process involves multiple steps to achieve a smooth and durable microcement finish over tiles.
Mixing microcement
Follow the manufacturer’s instructions to mix the microcement base coat. Typically, this involves combining the dry microcement powder with water and any required additives. Mix thoroughly to achieve a smooth, lump-free consistency.
Applying the base coat
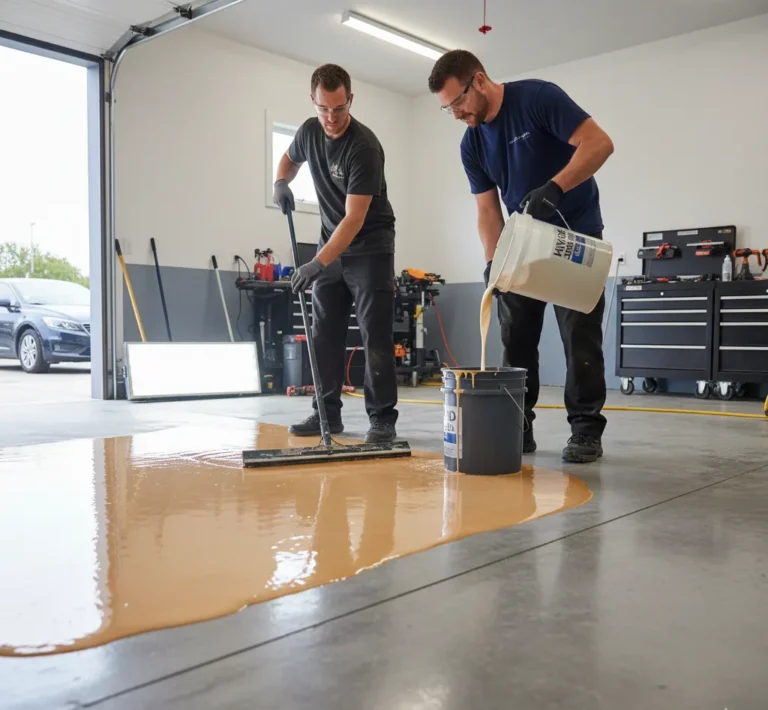
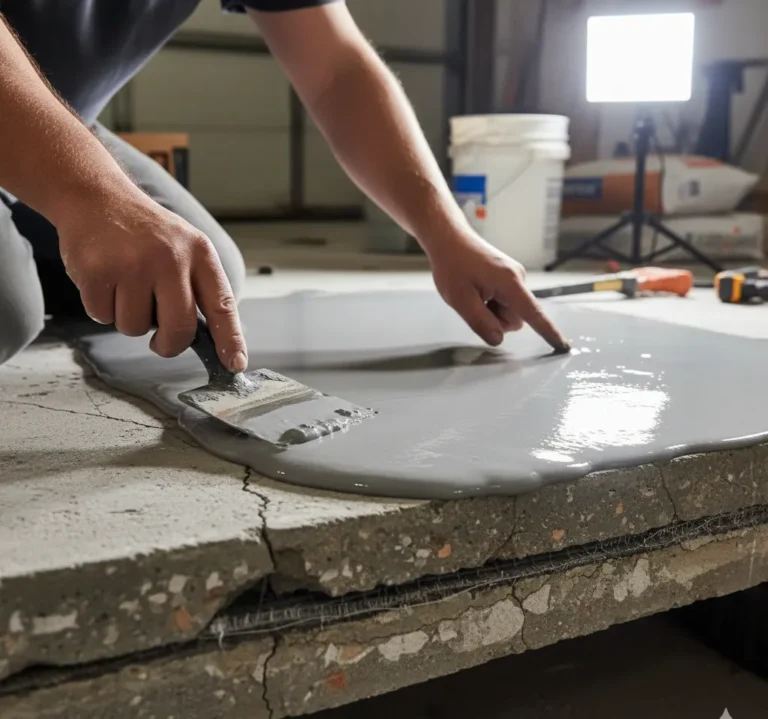
Using a trowel, apply the first layer of microcement base coat over the primed tile surface. Work in small sections, spreading the material evenly and ensuring complete coverage of the tiles and grout lines. Allow this layer to dry completely before proceeding.
Smoothing and leveling
Once the first layer is dry, lightly sand the surface to remove any imperfections. Apply a second layer of base coat, focusing on achieving a smooth and level surface. This step may require multiple thin layers to achieve the desired result.
Finishing
The finishing process is crucial for achieving the desired aesthetic and ensuring the durability of the microcement surface.
Applying the top coat
Mix the microcement finish coat according to the manufacturer’s instructions. Apply thin layers of the finish coat using a trowel, working in small sections to maintain a wet edge. The number of layers will depend on the desired finish and texture.
Sealing the microcement
After the final layer of microcement has dried completely, apply a suitable sealer to protect the surface and enhance its durability. Choose a sealer that is compatible with microcement and appropriate for the intended use of the space.
How to Install Sprayable Microcement 
Sprayable microcement offers a unique application method that can be particularly useful for large surfaces or intricate designs.
Preparation
Proper preparation is crucial for successful sprayable microcement application.
Surface preparation
Clean and prime the surface as you would for traditional microcement application. Ensure the area is well-ventilated and protected from overspray.
Required tools and materials
- Spray gun
- Compressor
- Sprayable microcement mix
- Protective gear (respirator, goggles, coveralls)
- Trowels for smoothing
Application
The application process for sprayable microcement differs from traditional methods but can offer faster coverage for large areas.
Mixing sprayable microcement
Follow the manufacturer’s instructions to mix the sprayable microcement. The consistency should be suitable for spraying through the chosen equipment.
Spraying techniques
Hold the spray gun at a consistent distance from the surface and move in smooth, overlapping passes. Apply thin, even coats to avoid drips or uneven texture.
Finishing
The finishing process for sprayable microcement is similar to traditional application methods.
Smoothing and sealing
Once the sprayed layers have dried, use a trowel to smooth the surface if desired. Apply a suitable sealer to protect the microcement and enhance its durability.
Learn to Create Microcement Samples with Uberdek & Skraffino | Bob Harris Tutorial
Creating samples is an essential step in any microcement project, allowing you to test different colors, textures, and finishes before committing to the full application.
Introduction to Microcement Samples
Samples provide a tangible representation of the final result, helping clients and designers make informed decisions.
Importance of samples in microcement projects
Samples allow for experimentation with different techniques, colors, and finishes without the commitment of a full-scale application. They help in visualizing the final result and ensuring client satisfaction.
Tools and materials needed
- Small trowels
- Mixing containers
- Uberdek and Skraffino microcement products
- Various sealers and finishes
- Sample boards or tiles
Creating Samples
The process of creating microcement samples involves careful application and experimentation with different techniques.
Mixing and applying microcement
Follow the manufacturer’s instructions to mix small batches of Uberdek and Skraffino microcement. Apply thin layers to sample boards, experimenting with different application techniques.
Techniques for different textures and finishes
Explore various troweling techniques, such as smooth, textured, or patterned finishes. Experiment with different tools and pressures to achieve unique effects.
Evaluating Samples
Careful evaluation of samples is crucial for achieving the desired final result.
Assessing the quality and consistency
Examine the samples for color consistency, texture, and overall appearance. Consider how the samples will translate to a larger scale application.
Making adjustments for desired results
Based on the evaluation, make necessary adjustments to the mixing ratios, application techniques, or color choices to achieve the desired outcome.
Is Microcement Cheaper Than Tiling? 
When considering flooring or wall covering options, cost is often a significant factor. Let’s compare the costs of microcement and tiling to help you make an informed decision.
Cost Comparison
The initial and long-term costs of microcement and tiling can vary significantly.
Initial costs of microcement vs. tiling
Microcement typically has a higher initial cost per square foot compared to most tile options. However, the seamless nature of microcement can result in less waste and potentially lower labor costs.
| Material | Average Cost per Square Foot (Materials Only) |
| Microcement | $10 – $20 |
| Ceramic Tile | $5 – $10 |
| Porcelain Tile | $3 – $30 |
Long-term maintenance costs
Microcement often requires less maintenance than tiled surfaces, potentially resulting in lower long-term costs. Tiled surfaces may need grout replacement or repairs over time, while microcement can be easily refreshed with a new sealer coat.
Factors Affecting Cost
Several factors can influence the overall cost of both microcement and tiling installations.
Material quality
Higher quality microcement products and premium tiles will naturally increase the overall cost of the project. However, investing in quality materials can result in better durability and longevity.
Installation complexity
The complexity of the installation can significantly impact labor costs. Intricate tile patterns or challenging microcement applications may require more time and expertise, increasing the overall project cost.
Is Microtopping the Same as Microcement?
While microtopping and microcement are often used interchangeably, there are some key differences between these two decorative concrete products.
Definitions
Understanding the basic definitions of microtopping and microcement is crucial for distinguishing between these materials.
What is microtopping?
Microtopping is a thin, cement-based overlay typically applied in layers of 1/16 inch or less. It’s designed to resurface existing concrete surfaces and provide a smooth, durable finish.
What is microcement?
Microcement is a fine-grained, polymer-modified cement-based coating that can be applied in multiple thin layers to various surfaces, including tiles, concrete, and wood. It offers a seamless, modern finish with high durability.
Key Differences
While similar in some aspects, microtopping and microcement have distinct characteristics that set them apart.
Composition and application
Microtopping is generally composed of Portland cement, fine aggregates, and polymer additives. It’s typically applied in one or two thin layers. Microcement, on the other hand, often contains finer aggregates and higher polymer content, allowing for multiple thin layers and a smoother finish.
Use cases and benefits
Microtopping is primarily used for resurfacing existing concrete floors and is ideal for both interior and exterior applications. Microcement offers more versatility and can be applied to various surfaces, including walls, countertops, and furniture, in addition to floors.
Why is Microcement Expensive?
Microcement is often considered a premium flooring and wall covering option, and its cost reflects this positioning. Let’s explore the factors contributing to its higher price point.
Material Costs
The quality and composition of microcement contribute significantly to its cost.
High-quality ingredients
Microcement is made with premium cement, fine aggregates, and high-performance polymers. These quality ingredients ensure durability, flexibility, and a smooth finish but also increase the overall cost of the product.
Specialized tools and equipment
Applying microcement requires specific tools and equipment, such as professional-grade trowels, mixers, and sealers. The cost of these specialized tools is often reflected in the overall project price.
Labor Costs
The application of microcement is a skilled process that requires expertise and time.
Skilled labor requirements
Microcement installation demands experienced professionals who understand the intricacies of the material and application techniques. This specialized skill set commands higher labor rates compared to more common flooring installations.
Time-intensive application process
Applying microcement involves multiple layers, each requiring drying time and careful preparation. This time-intensive process contributes to higher labor costs compared to single-layer flooring options.
Ideal Work’s Microtopping Microcement
Ideal Work’s Microtopping is a popular microcement product known for its versatility and high-quality finish. Let’s explore its features and application techniques.
Features and Benefits
Ideal Work’s Microtopping offers several advantages that make it a popular choice for designers and homeowners.
Durability and versatility
Microtopping is highly durable and resistant to wear, making it suitable for both residential and commercial applications. Its versatility allows for application on various surfaces, including floors, walls, and countertops.
Aesthetic appeal
The product offers a smooth, seamless finish that can be customized with different colors and textures. This versatility in appearance makes it adaptable to various design styles.
Application Techniques
Proper application is crucial for achieving the best results with Ideal Work’s Microtopping.
Surface preparation
Thoroughly clean and prime the surface before application. Any cracks or imperfections should be repaired to ensure a smooth final result.
Layering and finishing
Apply multiple thin layers of Microtopping, allowing each layer to dry completely before applying the next. The final layer can be troweled or textured to achieve the desired finish.
Microcement DIY
For those interested in tackling a microcement project themselves, proper preparation and technique are essential for a successful outcome.
Tools and Materials
Having the right tools and materials is crucial for a DIY microcement project.
Essential tools for DIY microcement
- Trowels (various sizes)
- Mixing bucket and drill mixer
- Sandpaper and sanding block
- Protective gear (gloves, goggles, mask)
- Measuring tools
Recommended materials
- Microcement base coat
- Microcement finish coat
- Primer
- Sealer
- Color pigments (if desired)
Step-by-Step Guide
Follow these steps for a successful DIY microcement application.
Surface preparation
- Clean the surface thoroughly
- Repair any cracks or imperfections
- Apply primer and allow to dry completely
Mixing and application
- Mix the microcement according to manufacturer’s instructions
- Apply thin layers using a trowel, working in small sections
- Allow each layer to dry before applying the next
- Sand between layers if necessary
Finishing and sealing
- Apply the final layer of microcement for the desired finish
- Allow to dry completely
- Apply sealer according to manufacturer’s instructions
Microcement Bathroom DIY
Applying microcement in a bathroom requires special considerations due to the high moisture environment.
Preparation
Proper preparation is crucial for a successful microcement bathroom project.
Surface cleaning and priming
Thoroughly clean all surfaces, removing any soap scum, mold, or mildew. Apply a suitable primer designed for use in wet areas.
Tools and materials needed
- Waterproof microcement product
- Waterproof primer and sealer
- Trowels and mixing equipment
- Protective gear
Application
Follow these steps for applying microcement in a bathroom setting.
Applying microcement to walls and floors
- Start with vertical surfaces (walls) before moving to horizontal surfaces (floors)
- Apply thin, even layers, allowing each to dry completely
- Pay special attention to areas around fixtures and edges
Creating a seamless finish
- Use consistent troweling techniques for a uniform appearance
- Blend edges between sections to avoid visible seams
- Sand lightly between layers if necessary for a smooth finish
Finishing
Proper finishing is essential for ensuring the longevity of microcement in a bathroom environment.
Sealing for waterproofing
Apply a high-quality, waterproof sealer designed for use with microcement. Multiple coats may be necessary for optimal protection.
Maintenance tips
- Clean regularly with pH-neutral cleaners
- Avoid harsh chemicals or abrasive cleaning tools
- Reapply sealer as recommended by the manufacturer
Microcement Kitchen
Microcement can be an excellent choice for kitchen surfaces, offering durability and a modern aesthetic.
Applications
Microcement can be used in various areas of the kitchen for a cohesive look.
Kitchen countertops
Microcement provides a seamless, easy-to-clean surface for countertops. It can be customized to match various design styles and color schemes.
Backsplashes and cabinets
Applying microcement to backsplashes and cabinet fronts can create a unified, modern look throughout the kitchen.
Benefits
Microcement offers several advantages for kitchen applications.
Durability and ease of cleaning
Microcement is highly resistant to stains and scratches, making it ideal for the high-traffic kitchen environment. Its seamless nature also makes it easy to clean and maintain.
Aesthetic versatility
With a wide range of colors and finishes available, microcement can be customized to suit any kitchen design, from minimalist modern to rustic farmhouse styles. Microcement shower innovation brings a sleek and modern look to bathrooms It creates a smooth waterproof surface that is easy to clean and maintain Sleek microcement surfaces are smooth and modern-looking floors or walls They are made from a special cement mixture that creates a seamless and stylish finish
Top microcement producers Leading companies that make high-quality thin cement coatings for floors and walls are known as Flooring durability comparison Different types of floors can last longer or shorter depending on how they are made and used Some floors are tougher and can handle more wear and tear while others might need to be replaced sooner
Microcement museum flooring is a smooth and durable surface that looks modern in art galleries and museums It is easy to clean and can be made in many colors to match the style of the building Boutique microcement displays show off smooth and stylish surfaces These special displays highlight the unique look of microcement finishes
Minimalist exhibition finishes use simple clean designs without extra decorations They focus on basic shapes and colors to create a calm and uncluttered look in art displays Polished conference microcement is a smooth and shiny floor coating used in meeting rooms It makes the floor look fancy and is easy to clean for big gatherings
Microcement countertops modernize kitchens by giving a sleek and smooth look to the cooking area These thin and durable surfaces come in many colors to match any kitchen style
White Microcement Bathroom
White microcement can create a clean, spacious feel in bathroom designs, offering a modern and versatile aesthetic.
Design Ideas
White microcement provides a blank canvas for various design styles.
Minimalist and modern styles
The smooth, seamless finish of white microcement lends itself well to minimalist bathroom designs, creating a clean and uncluttered look.
Combining with other materials
White microcement can be paired with natural wood, metal accents, or colorful tiles to create visual interest and texture in the bathroom design.
Application Techniques
Achieving a flawless white microcement finish requires careful application and attention to detail.
Achieving a smooth, white finish
- Apply multiple thin layers of white microcement
- Sand between layers for a perfectly smooth surface
- Use consistent troweling techniques to avoid visible marks
Sealing and maintenance
Apply a high-quality, non-yellowing sealer to protect the white finish. Regular cleaning with pH-neutral products will help maintain the pristine appearance.
Microcement Installers Near Me
Finding a skilled microcement installer is crucial for achieving the best results in your project.
Finding Installers
Use these tips to locate reputable microcement installers in your area.
Tips for choosing a reliable installer
- Check online reviews and portfolios
- Ask for references from past clients
- Verify certifications and training
- Request detailed quotes from multiple installers
Questions to ask potential installers
- How long have you been working with microcement?
- Can you provide examples of similar projects?
- What is your process for surface preparation and application?
- What type of warranty do you offer?
Working with Installers
Establish clear communication and expectations when working with a microcement installer.
Setting expectations
Discuss your design vision, timeline, and budget with the installer. Be clear about your expectations for the final result.
Ensuring quality work
- Request regular updates throughout the project
- Inspect the work at various stages
- Discuss any concerns promptly with the installer


