I. What is Exterior Concrete Staining and Sealing
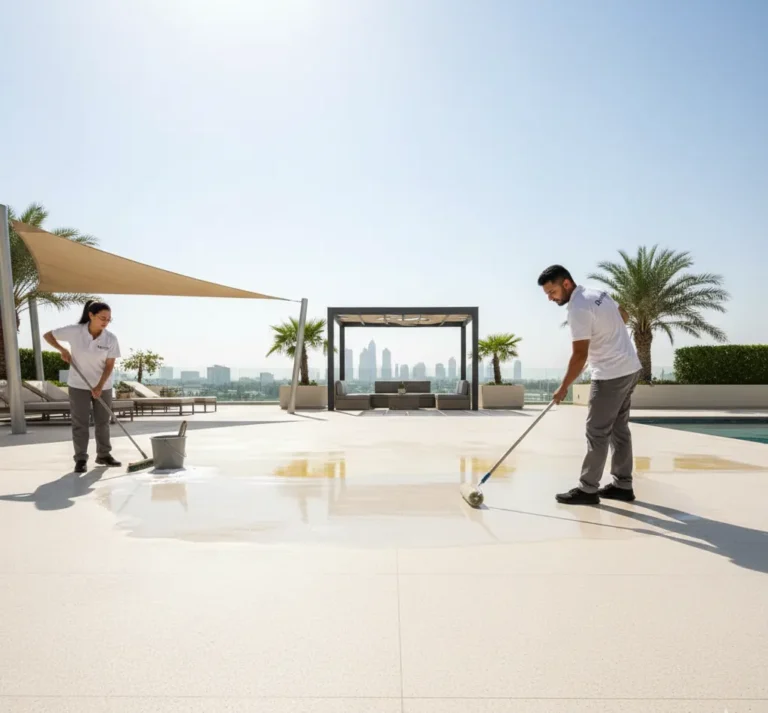
Staining and sealing exterior concrete surfaces is an excellent way to enhance the appearance and durability of your outdoor spaces. Whether you’re looking to revamp your patio, driveway, or pool deck, this process can transform dull, gray concrete into a beautiful and long-lasting surface. By applying stain and sealer, you can protect your concrete from weathering, stains, and wear while adding color and depth to its appearance.
Concrete staining and sealing offer numerous benefits:
- Enhanced aesthetics
- Increased durability
- Protection against UV rays and moisture
- Easier maintenance
- Improved resistance to chemicals and stains
II. How to Stain and Seal Exterior Concrete Surfaces: An Overview
Benefits of staining and sealing concrete
Staining and sealing concrete surfaces offer numerous advantages that go beyond mere aesthetics. This process not only enhances the visual appeal of your exterior concrete but also provides long-term protection and durability.
One of the primary benefits is the increased resistance to weathering and UV rays. Sealed concrete is less likely to crack, chip, or fade due to exposure to the elements. Additionally, the sealer creates a barrier against moisture, preventing water penetration that can lead to damage over time.
Another advantage is the ease of maintenance. Sealed concrete is much easier to clean and maintain, as it resists stains and spills. This makes it an ideal choice for high-traffic areas like driveways and patios.
Types of exterior concrete surfaces suitable for staining
Various exterior concrete surfaces can benefit from staining and sealing. Some common areas include:
- Driveways
- Patios
- Pool decks
- Walkways
- Retaining walls
- Outdoor kitchens
When considering staining and sealing, it’s important to assess the condition of your concrete surface. Older concrete may require additional preparation or repairs before the staining process can begin.
| Surface Type | Suitability for Staining | Preparation Required |
| New concrete | Excellent | Minimal |
| Old concrete | Good | Thorough cleaning and repairs |
| Stamped concrete | Very good | Careful cleaning to preserve texture |
| Exposed aggregate | Good | Special cleaning techniques |
III. Choosing the Right Concrete Stain
Water-based stains vs. acid stains
When selecting a concrete stain, you’ll primarily encounter two types: water-based stains and acid stains. Each has its own characteristics and benefits.
Water-based stains are easier to apply and come in a wider range of colors. They create a more uniform appearance and are generally more environmentally friendly. These stains are ideal for DIY projects and offer quicker drying times.
Acid stains, on the other hand, react chemically with the concrete to create unique, variegated patterns. They penetrate deeper into the concrete and produce a more natural, mottled look. While they offer excellent durability, acid stains require more careful application and safety precautions.
Penetrating stains vs. surface stains
Another consideration is whether to use penetrating stains or surface stains. Penetrating stains seep into the concrete pores, creating a more permanent color that won’t chip or peel. They’re ideal for high-traffic areas and offer excellent UV resistance.
Surface stains, also known as concrete dyes, sit on top of the concrete. They provide vibrant colors and can be easier to apply but may be less durable in the long run. Surface stains are a good choice for areas with less foot traffic or where you want to achieve bold, vivid hues.
Factors to consider when selecting a stain
When choosing a concrete stain, consider the following factors:
- Desired color and finish
- Concrete surface condition
- Level of traffic the area receives
- Climate and exposure to elements
- Ease of application
- Durability requirements
- Budget constraints
It’s always a good idea to test the stain on a small, inconspicuous area before committing to the entire project. This will give you a better idea of the final color and how it interacts with your specific concrete surface.
IV. Preparing Exterior Concrete for Staining
Cleaning the surface
Proper surface preparation is crucial for achieving the best results when staining exterior concrete. The first step is thoroughly cleaning the surface to remove any dirt, grime, or existing sealers that may interfere with the staining process.
Start by sweeping the area to remove loose debris. Then, use a pressure washer or a stiff-bristled brush with a concrete cleaner to scrub the surface. Pay special attention to any oil stains or stubborn dirt. Rinse the area thoroughly and allow it to dry completely before proceeding.
For tougher stains or old sealers, you may need to use a chemical stripper or etching solution. Always follow the manufacturer’s instructions and safety guidelines when using these products.
Repairing cracks and imperfections
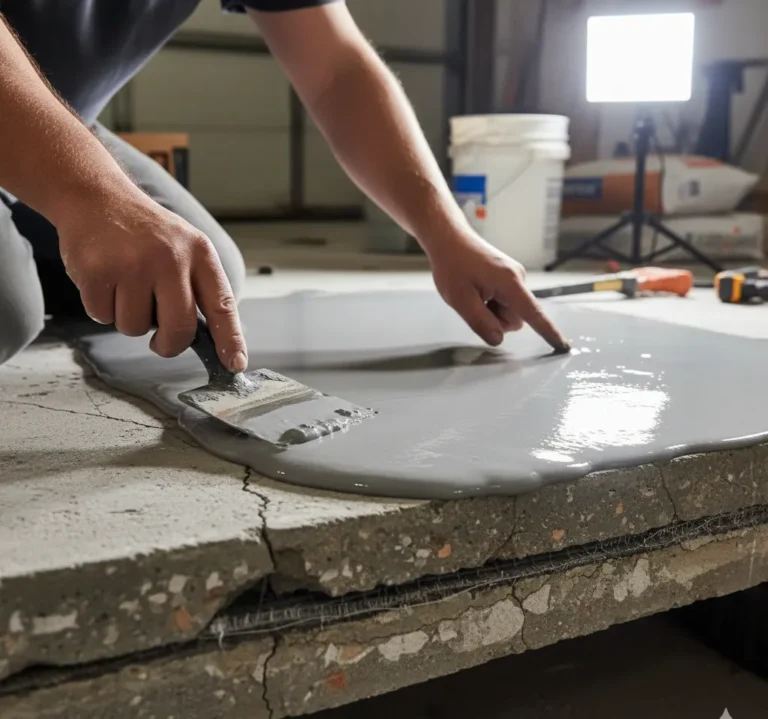
Before staining, it’s essential to address any cracks, chips, or other imperfections in the concrete surface. Small cracks can be filled with a concrete patching compound, while larger cracks may require more extensive repair.
Use a concrete grinder to smooth out any uneven areas or raised edges. This will ensure a uniform surface for staining and prevent pooling of the stain or sealer.
Testing for moisture and pH levels
Moisture and pH levels can significantly affect the staining process. Excessive moisture can prevent the stain from adhering properly, while high pH levels can interfere with the chemical reaction of acid stains.
To test for moisture, tape a plastic sheet to the concrete surface and leave it for 24 hours. If condensation forms under the plastic, the concrete may be too damp for staining. For pH testing, use pH test strips or a digital pH meter to ensure the concrete’s pH is between 7 and 10.
Preparation checklist:
- Clean the surface thoroughly
- Remove existing sealers or coatings
- Repair cracks and imperfections
- Grind uneven areas
- Test for moisture and pH levels
- Allow the surface to dry completely
V. Applying Concrete Stain to Exterior Surfaces 
Tools and materials needed
Before beginning the staining process, gather all necessary tools and materials:
- Concrete stain
- Protective gear (gloves, goggles, respirator)
- Sprayer or roller for application
- Brushes for detail work
- Plastic sheeting for protecting adjacent areas
- Mixing buckets
- Stirring sticks
- Clean water for dilution and cleanup
Step-by-step application process
- Protect surrounding areas with plastic sheeting or tape.
- Mix the stain according to the manufacturer’s instructions.
- Apply a thin, even coat of stain using a sprayer, roller, or brush.
- Work in small sections, maintaining a wet edge to avoid lap marks.
- Allow the first coat to dry completely (usually 4-6 hours).
- Apply a second coat if desired for deeper color or coverage.
- Let the stain cure for the recommended time before sealing.
Tips for achieving desired color and effects
To achieve the best results when staining exterior concrete surfaces, consider these tips:
- Apply stain in thin, even coats for more uniform color
- Use circular motions when applying to create a more natural look
- Experiment with different application techniques for unique effects
- Consider using multiple colors for added depth and interest
- Allow each coat to dry completely before applying the next
- Be patient and take your time for the best outcome
Remember that concrete stains are translucent, so the final color will be influenced by the underlying concrete. Darker stains may require multiple coats to achieve the desired depth of color.
VI. Selecting the Appropriate Concrete Sealer
Water-based vs. solvent-based sealers
When choosing a sealer for your stained concrete, you’ll need to decide between water-based and solvent-based options. Each type has its own advantages and considerations.
Water-based sealers are eco-friendly, low-odor, and easy to apply. They dry quickly and are less likely to yellow over time. However, they may not provide as much protection against harsh chemicals as solvent-based sealers.
Solvent-based sealers offer excellent durability and chemical resistance. They enhance the color of the stain and provide a glossier finish. However, they have strong odors and require more careful application due to their flammability.
Penetrating sealers vs. film-forming sealers
Another important distinction is between penetrating sealers and film-forming sealers.
Penetrating sealers soak into the concrete, providing protection without changing the surface texture. They’re ideal for areas that need to maintain slip resistance, such as pool decks or driveways. These sealers don’t wear off the surface and typically last longer.
Film-forming sealers create a protective layer on top of the concrete. They enhance color and provide a glossy finish but can make the surface slippery when wet. These sealers may need to be reapplied more frequently as they wear down over time.
Factors to consider when choosing a sealer
When selecting a sealer for your stained concrete, consider the following:
- Level of traffic the area receives
- Exposure to UV rays and weather conditions
- Desired finish (matte, satin, or glossy)
- Need for slip resistance
- Chemical resistance requirements
- Ease of application and maintenance
- Budget constraints
It’s important to choose a sealer that’s compatible with the type of stain you’ve used. Always read the manufacturer’s recommendations and test the sealer on a small area before applying it to the entire surface.
| Sealer Type | Pros | Cons |
| Water-based | Eco-friendly, low odor, easy cleanup | Less chemical resistance |
| Solvent-based | Excellent durability, enhances color | Strong odor, flammable |
| Penetrating | Maintains slip resistance, long-lasting | Minimal change in appearance |
| Film-forming | Enhances color, provides glossy finish | Can be slippery, needs reapplication |
VII. How to Stain and Seal Exterior Concrete Surfaces:  Sealing Process
Preparing the stained surface for sealing
Before applying the sealer, ensure that the stained concrete surface is fully cured and clean. The curing time for stains can vary, so follow the manufacturer’s recommendations. Once cured, clean the surface to remove any dust or debris that may have accumulated.
If the stained surface has been exposed to foot traffic or weather, you may need to clean it more thoroughly. Use a mild detergent and water solution, scrubbing gently to avoid damaging the stain. Rinse the surface completely and allow it to dry before proceeding.
Applying the sealer
The application process for concrete sealers can vary depending on the type of sealer you’ve chosen. However, here are some general steps to follow:
- Ensure the area is well-ventilated and wear appropriate protective gear.
- Mix or stir the sealer according to the manufacturer’s instructions.
- Apply the sealer using a roller, sprayer, or brush, depending on the product recommendations.
- Work in small sections, maintaining a wet edge to avoid lap marks.
- Apply thin, even coats for the best results.
- Allow the first coat to dry completely before applying a second coat, if needed.
Drying and curing time
After applying the sealer, it’s crucial to allow adequate time for drying and curing. The drying time is when the sealer becomes dry to the touch, while curing refers to the time it takes for the sealer to reach its full hardness and effectiveness.
Drying times can range from a few hours to 24 hours, depending on the type of sealer and environmental conditions. Curing times are typically longer, often 24 to 72 hours for foot traffic and up to a week for vehicle traffic.
During this time, protect the sealed surface from:
- Foot traffic
- Vehicle traffic
- Water exposure
- Extreme temperatures
- Direct sunlight (for some sealers)
Always refer to the manufacturer’s guidelines for specific drying and curing times, as these can vary significantly between products.
VIII. Maintaining Stained and Sealed Exterior Concrete
Regular cleaning and maintenance
Proper maintenance is key to preserving the beauty and durability of your stained and sealed concrete surfaces. Regular cleaning helps prevent dirt and grime buildup, which can dull the appearance of the stain and wear down the sealer over time.
For routine cleaning:
- Sweep or blow off loose debris regularly.
- Use a mild detergent and water solution for general cleaning.
- Avoid harsh chemicals or abrasive cleaning tools that could damage the sealer.
- Rinse thoroughly with clean water after washing.
- Address spills promptly to prevent staining.
For tougher stains, use cleaners specifically designed for sealed concrete surfaces. Always test any new cleaning product on a small, inconspicuous area first.
Reapplication of sealer
Over time, the sealer on your concrete surface will wear down due to foot traffic, weather exposure, and general use. Reapplying the sealer periodically helps maintain protection and keeps the stained concrete looking its best.
The frequency of reapplication depends on several factors:
- Type of sealer used
- Amount of traffic the area receives
- Exposure to UV rays and weather
- Quality of initial application
As a general guideline, exterior concrete surfaces may need resealing every 2-3 years. However, high-traffic areas or those exposed to harsh conditions may require more frequent resealing.
Signs that it’s time to reseal include:
- Water no longer beads on the surface
- Visible wear patterns in high-traffic areas
- Dull or faded appearance of the stain
When resealing, clean the surface thoroughly and repair any damage before applying the new coat of sealer.
Addressing common issues
Even with proper maintenance, you may encounter some issues with your stained and sealed concrete over time. Here are some common problems and how to address them:
- Efflorescence: This white, powdery substance can be removed with a mild acid solution or specialized efflorescence remover.
- Peeling or flaking sealer: Remove the damaged sealer, clean the surface, and reapply a new coat of sealer.
- Stains: Use a cleaner designed for the specific type of stain (oil, rust, etc.) and follow up with a gentle scrubbing.
- Fading: If the stain is fading, you may need to clean the surface and apply a new coat of stain before resealing.
- Cracks: Small cracks can be filled with a concrete patching compound. Larger cracks may require professional repair.
Regular inspections of your stained and sealed concrete can help you catch and address these issues early, prolonging the life and beauty of your exterior surfaces.
IX. Advanced Techniques for Staining Exterior Concrete
Creating patterns and designs
Staining concrete offers opportunities for creative expression beyond solid colors. By using stencils, tape, or freehand techniques, you can create intricate patterns and designs on your exterior concrete surfaces.
To create patterns:
- Plan your design and mark it on the concrete surface.
- Use painter’s tape or stencils to mask off areas.
- Apply different colors of stain to create the desired pattern.
- Remove tape or stencils carefully after the stain has dried.
- Seal the entire surface to protect the design.
Popular pattern ideas include:
- Geometric shapes
- Tile-like designs
- Borders and accents
- Nature-inspired motifs
Combining multiple stain colors
Using multiple stain colors can add depth and interest to your concrete surfaces. This technique can create a more natural, variegated look or bold, artistic effects.
Techniques for combining colors include:
- Layering: Apply one color, let it dry, then apply another over it.
- Marbling: Apply two or more colors simultaneously and blend them while wet.
- Color washing: Apply a base color, then lightly brush on a contrasting color.
- Highlighting: Use a lighter color to accentuate texture or create depth.
When combining colors, always test your technique on a small area or sample board first to ensure you achieve the desired effect.
Antiquing and color washing techniques
Antiquing and color washing are advanced techniques that can give your concrete surfaces an aged or weathered appearance.
For antiquing:
- Apply a base stain color and allow it to dry.
- Mix a darker stain color with water or a special antiquing solution.
- Apply the antiquing mixture over the base color, working in small sections.
- Immediately wipe off excess with a cloth or sponge to create a mottled effect.
- Seal the surface once the desired look is achieved.
Color washing involves:
- Applying a base stain color.
- Mixing a contrasting color with water to create a translucent wash.
X. Personal Protective Equipment
When working with concrete stains and sealers, personal protective equipment (PPE) is essential to protect against potential hazards.
Gloves and Safety Glasses
Wear chemical-resistant gloves and safety glasses to prevent skin and eye contact with the stain or sealer. This is crucial as these products can be irritating or harmful upon contact.
Respirators or Masks
Use a respirator or mask to avoid inhaling harmful fumes or dust particles. Concrete stains and sealers often contain volatile organic compounds (VOCs) that can be harmful when inhaled.
Protective Clothing
Wear long sleeves, pants, and closed-toe shoes to minimize skin exposure to chemicals. Protective clothing helps prevent accidental spills or splashes from coming into contact with your skin.
| PPE Type | Purpose |
| Gloves and Safety Glasses | Protects skin and eyes from chemicals |
| Respirators or Masks | Prevents inhalation of harmful fumes |
| Protective Clothing | Reduces risk of skin contact with chemicals |
Proper Ventilation
Ventilation is crucial when working with concrete stains and sealers to ensure a safe working environment and effective application.
Work in Well-Ventilated Areas
Ensure that the workspace is well-ventilated to disperse fumes and prevent the buildup of harmful vapors. Open windows and use fans to enhance air circulation.
Avoid Enclosed Spaces
Avoid working in enclosed or poorly ventilated spaces where fumes can accumulate. If working indoors, use air purifiers or ventilation systems designed for chemical fumes.
Check Ventilation Equipment
Regularly check and maintain ventilation equipment to ensure it is functioning properly. Properly working equipment helps in managing air quality and safety. Quartz flooring installation Restaurant flooring choices Restaurants can pick from many types of floors like wood tile or carpet Each option has its own look and benefits for different dining spaces
Concrete application techniques involve different ways to put concrete in place These methods help make sure concrete is spread evenly and smoothly for construction projects Concrete sealers reviewed shows which products work best to protect driveways and patios These reviews help homeowners choose the right sealer for their concrete surfaces
Colored villa walkways make homes look pretty and fun They use bright paints to create paths that catch your eye Concrete patio designs offer many creative options for outdoor spaces You can choose from various patterns colors and textures for
Salon entrance flooring The floor at the entrance of a salon is important because it’s the first thing customers see It should be attractive and easy to clean to make a good impression Concrete storefront enhancements make shops look better and more inviting These improvements can include new walls floors or decorations for the store entrance
Villa driveway restoration brings new life to old driveways It makes your home look better and safer to drive on Concrete beautifies museums by creating stunning modern structures Its smooth surfaces and unique shapes make art spaces look amazing
Flooring palette navigation helps you choose different floor types and colors Use Upscale concrete flooring is a fancy way to make floors look cool and smooth It’s strong and can be colored or designed to make rooms look really nice
Polished concrete lobbies are shiny and smooth floors in building entrances They look modern and are easy to clean making the space look fancy and welcoming Decorative concrete trends are becoming more popular in homes and businesses People are using colorful patterns and textures to make their floors and walls look unique
Acrylic floor protection is a clear coating that helps keep floors safe from scratches and spills It makes cleaning easier and helps your floors look nice for a longer time Hospitality concrete pigments are special colorful powders mixed into concrete to make floors and walls look pretty in hotels and restaurants
Artistic concrete finishes make plain concrete look beautiful and unique Slip-resistant flooring safeguards
Fireproof kitchen flooring is a special type of floor that doesn’t catch fire easily It helps keep your kitchen safe if something hot spills or if there’s an accident with flames
Handling and Storing Chemicals
Proper handling and storage of chemicals used for staining and sealing are vital for safety and effectiveness.
Follow Manufacturer Instructions
Always adhere to the manufacturer’s instructions for handling and storing chemicals. This includes recommended storage conditions and safety precautions.
Store in Original Containers
Keep chemicals in their original containers with labels intact. This helps in identifying the contents and understanding any hazards associated with them.
Avoid Mixing Chemicals
Do not mix different chemicals unless explicitly stated by the manufacturer. Mixing can create dangerous reactions or reduce the effectiveness of the products.
XI. How to Stain and Seal Exterior Concrete Surfaces
Staining and sealing exterior concrete surfaces involve specific steps to ensure durability and aesthetic appeal.
Surface Preparation
Start by cleaning the concrete surface to remove dirt, grime, and stains. Use a pressure washer if necessary to achieve a thorough clean. Repair any cracks or imperfections before proceeding.
Apply the Stain
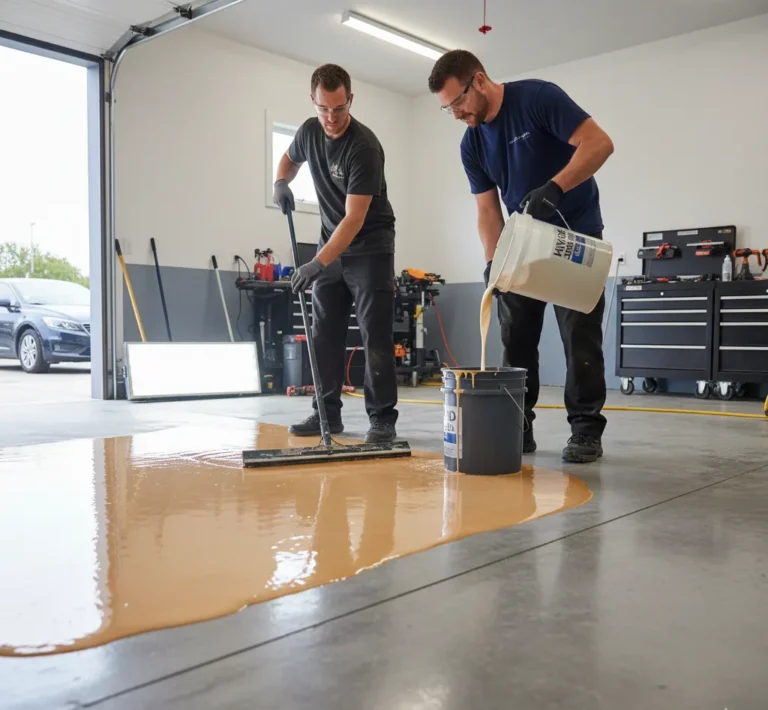
Choose a stain suitable for exterior use and apply it evenly with a roller or sprayer. Follow the manufacturer’s instructions for application and drying times. Multiple coats may be needed for the desired color intensity.
Seal the Surface
After the stain has dried, apply a high-quality sealer designed for exterior use. Use a roller or sprayer for even application. Ensure that the sealer is compatible with the stain used and allow it to cure as per the manufacturer’s guidelines.
Maintain the Surface
Regular maintenance includes cleaning the surface with mild cleaners and reapplying sealer as needed to maintain appearance and protection.
FAQs
How long does stained and sealed exterior concrete last?
Stained and sealed exterior concrete can last several years, typically between 5 to 10 years, depending on factors like the quality of materials, weather conditions, and maintenance practices. Regular upkeep and prompt repairs can extend the lifespan of the finish.
Can I stain and seal my concrete driveway myself?
Yes, you can stain and seal your concrete driveway yourself if you have the necessary tools and experience. However, proper preparation and application are crucial for achieving a professional-looking finish. Following the manufacturer’s instructions and safety guidelines will help ensure a successful project.
What’s the best time of year to stain and seal exterior concrete?
The best time to stain and seal exterior concrete is during mild weather conditions, typically in spring or fall. Avoid extreme temperatures and high humidity, as these can affect the application and curing process. Ensure that the weather forecast is clear of rain for the duration of the project.
How do I remove old stain or sealer from exterior concrete?
To remove old stain or sealer, use a concrete stripper or remover specifically designed for this purpose. Apply the stripper according to the manufacturer’s instructions, then scrub and rinse the surface thoroughly. For stubborn residues, you may need to repeat the process or use a power washer.
Can I change the color of my stained concrete later?
Yes, it is possible to change the color of stained concrete later. However, the process involves stripping the old stain, preparing the surface, and applying a new stain. It’s essential to follow proper procedures to ensure that the new stain adheres well and achieves the desired color.
