In recent years, microcement has emerged as a popular choice for modern bathroom designs, particularly for shower floors and walls. This innovative material offers a seamless, contemporary look while providing exceptional durability and water resistance. Let’s delve into the world of microcement and explore why it’s becoming a go-to option for shower installations.
What is Microcement?
Microcement is a thin, cement-based coating that can be applied to various surfaces, including existing tiles, concrete, and even wood. It’s composed of fine aggregates, cement, water-based resins, and additives that create a smooth, durable finish. The versatility of microcement allows it to be used on floors, walls, and other surfaces, making it an ideal choice for bathroom renovations.
Why Choose Microcement for Showers?
Microcement offers numerous advantages for shower applications:
- Seamless appearance
- Water-resistant properties
- Easy maintenance
- Customizable colors and textures
- Durability and longevity
These features make microcement an attractive option for homeowners and designers looking to create modern, low-maintenance shower spaces.
Benefits of Microcement Shower Floor
Aesthetic Appeal and Modern Design
Microcement provides a sleek, contemporary look that can transform any bathroom into a stylish oasis. The seamless finish eliminates grout lines, creating a clean and uninterrupted surface that enhances the visual appeal of your shower space. With its ability to be customized in various colors and textures, microcement allows for endless design possibilities to suit your personal taste and complement your bathroom decor.
- Seamless, grout-free appearance
- Wide range of color options
- Customizable textures (smooth, matte, or textured)
- Modern, minimalist aesthetic
Water-Resistant and Easy to Clean
One of the most significant advantages of using microcement in showers is its excellent water-resistant properties. When properly sealed, microcement creates a non-porous surface that repels water and prevents moisture penetration. This characteristic not only protects the underlying substrate but also makes cleaning and maintenance a breeze.
- Highly water-resistant when sealed
- Non-porous surface prevents mold and mildew growth
- Easy to wipe clean with mild soap and water
- Resistant to common bathroom chemicals
Durability and Long-Lasting Performance
Microcement is renowned for its durability and ability to withstand daily wear and tear. When applied correctly and maintained properly, a microcement shower floor or wall can last for many years without showing signs of deterioration. Its resistance to cracks, chips, and stains makes it an excellent long-term investment for your bathroom.
- High resistance to impact and abrasion
- Minimal shrinkage and expansion
- Resistant to UV rays, preventing discoloration
- Long lifespan with proper care and maintenance
Versatility in Colour and Texture Options 
Microcement offers unparalleled versatility when it comes to design options. With a wide range of colors and textures available, you can create a truly unique shower space that reflects your personal style. Whether you prefer a bold, statement-making look or a subtle, neutral aesthetic, microcement can be customized to achieve your desired result.
| Color Options | Texture Options |
| White | Smooth |
| Gray | Matte |
| Beige | Textured |
| Charcoal | Polished |
| Custom colors | Rustic |
Installation Process of Microcement Shower Floor
Preparing the Substrate
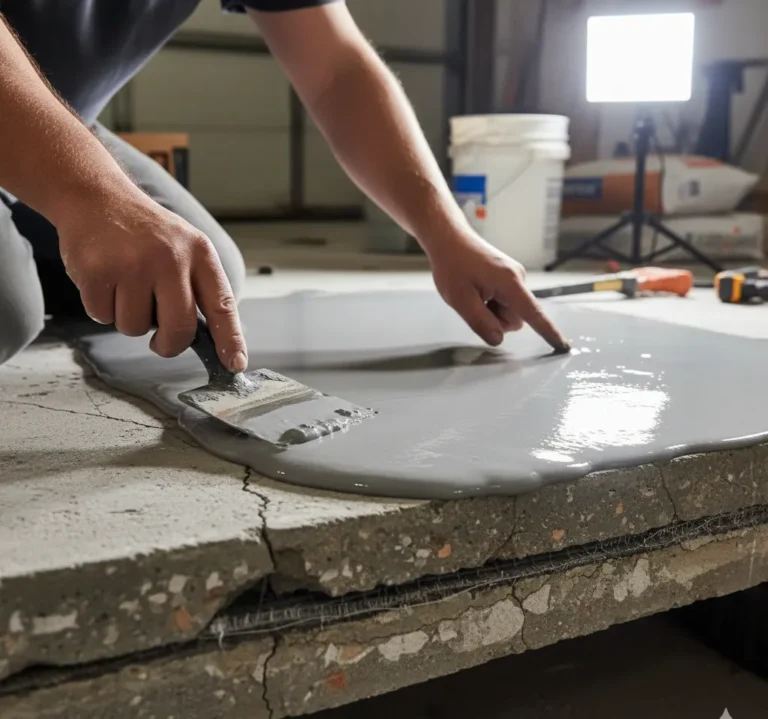
Proper substrate preparation is crucial for a successful microcement installation. The surface must be clean, dry, and free of any contaminants that could affect adhesion. Existing tiles or surfaces should be thoroughly cleaned and any loose or damaged areas repaired.
- Remove any existing grout or sealant
- Repair cracks or imperfections in the substrate
- Apply a primer to enhance adhesion
- Ensure the surface is level and smooth
Application Techniques
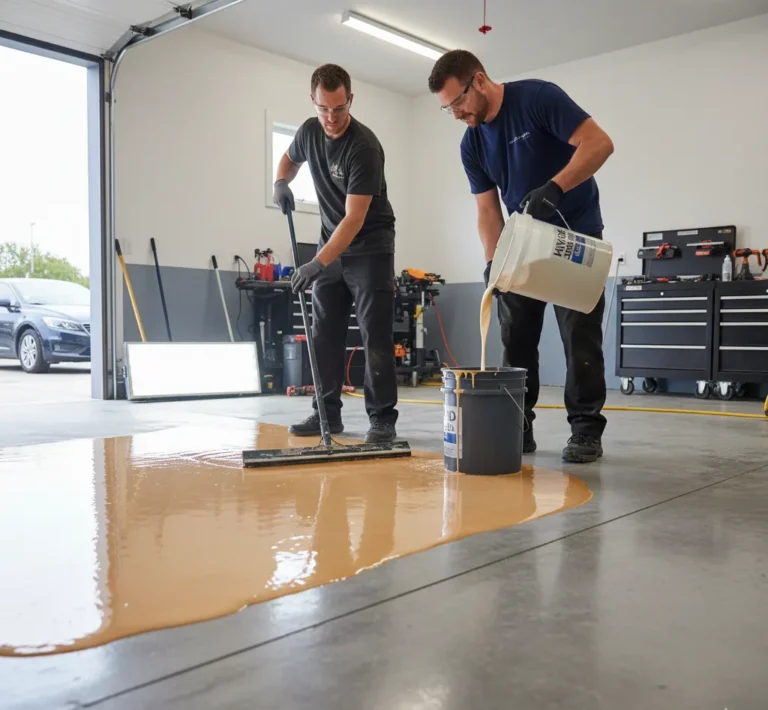
The application of microcement requires skill and precision to achieve the desired result. Typically, multiple layers are applied to build up the desired thickness and create a durable finish. Each layer is allowed to dry before the next is applied, with sanding between coats to ensure a smooth surface.
- Apply base coat
- Sand and clean surface
- Apply subsequent layers (usually 2-3)
- Sand and smooth between each layer
- Allow proper drying time between coats
Sealing for Longevity
To ensure the longevity and water-resistance of your microcement shower, proper sealing is essential. A high-quality sealer creates a protective barrier that prevents water penetration and enhances the material’s durability.
- Choose a sealer specifically designed for microcement
- Apply multiple thin coats for optimal protection
- Allow adequate drying time between coats
- Reapply sealer periodically as recommended by the manufacturer
Design Ideas for Microcement Shower Floor 
Microcement Bathtub and Shower
Extend the seamless look of your microcement shower to include the bathtub area. This creates a cohesive and visually striking bathroom design that maximizes the impact of the material.
- Seamless transition from shower to bathtub
- Consistent color and texture throughout
- Opportunity for unique design elements, such as built-in shelves or niches
Microcement on Countertop and Bathroom Sink
Incorporate microcement into other bathroom surfaces for a unified look. Applying microcement to countertops and sinks creates a sleek, modern aesthetic that complements the shower area.
- Seamless integration of sink and countertop
- Consistent design language throughout the bathroom
- Opportunity for custom-shaped sinks and countertops
Microcement Shelves in Bathroom
Utilize microcement to create functional and stylish storage solutions within your shower or bathroom. Built-in shelves or niches can be seamlessly integrated into the wall design, providing practical storage without disrupting the clean lines of the space.
- Custom-sized shelves to fit your needs
- Seamless integration with shower walls
- Opportunity for accent lighting or contrasting colors
Microcement Walls and Floors in Bathrooms
For a truly cohesive look, consider applying microcement to both the walls and floors of your entire bathroom. This creates a stunning, spa-like atmosphere with a continuous flow of color and texture.
- Seamless transition from floor to walls
- Opportunity for creative color blocking or patterns
- Enhanced sense of spaciousness in smaller bathrooms
Maintenance Tips for Microcement Shower Floor
Daily Cleaning Routine
Maintaining a microcement shower is relatively simple and straightforward. Regular cleaning helps preserve the appearance and integrity of the surface.
- Wipe down surfaces with a soft cloth or squeegee after each use
- Use a mild, pH-neutral soap for routine cleaning
- Avoid abrasive cleaners or scrub brushes that could damage the sealer
Handling Stains and Spills
While microcement is resistant to staining, it’s important to address spills promptly to prevent potential discoloration or damage.
- Clean up spills immediately with a damp cloth
- For stubborn stains, use a specialized microcement cleaner
- Avoid using harsh chemicals or acidic cleaners
Long-Term Care
To ensure the longevity of your microcement shower, periodic maintenance is necessary. Microcement tiles longevity Microcement tiles can last for many years if they are properly installed and maintained They are durable and resistant to wear making them a long-lasting option for floors and walls Dubai cultural spaces microcement is a special material used to make floors and walls look smooth in places where people learn about Dubai’s culture It helps create a modern look while still respecting the traditional feel of these important spaces
Microcement units transform boutiques by giving stores a sleek modern look These smooth surfaces create a stylish backdrop for displaying products Minimalist microcement walls create a smooth and sleek look in homes They are perfect for modern spaces that want a clean and simple style
Sleek microcement surfaces are smooth and modern-looking floors or walls They are made by applying thin layers of a special cement mixture to create a seamless and stylish finish
- Reapply sealer every 2-3 years or as recommended by the manufacturer
- Inspect for any signs of wear or damage and address promptly
- Consider professional cleaning and resealing for optimal results
Comparing Microcement Shower Floor with Traditional Materials
Cost Comparison
When evaluating the cost of microcement compared to traditional shower materials, it’s important to consider both initial installation costs and long-term maintenance expenses.
| Material | Initial Cost | Maintenance Cost | Lifespan |
| Microcement | Moderate | Low | 15-20 years |
| Ceramic Tile | Low-Moderate | Moderate | 10-15 years |
| Natural Stone | High | High | 20+ years |
Performance and Durability
Microcement offers excellent performance and durability compared to many traditional shower materials. Microcement tile overlay is a thin layer of cement-like material that can be applied over existing tiles to give them a new look It’s a quick way to update floors or walls without removing old tiles Durable microcement flooring is a tough and long-lasting floor covering that looks smooth and modern It can be applied over existing floors to create a strong surface that resists wear and tear
Microcement brands comparison Different companies make microcement and each one has its own special mix some are stronger while others look nicer so it’s good to check them all before choosing
- Resistant to cracks and chips
- Excellent water resistance when properly sealed
- Low maintenance requirements
- Comparable lifespan to high-end materials
Aesthetic Differences
The aesthetic appeal of microcement sets it apart from traditional shower materials.
- Seamless, grout-free appearance
- Wide range of color and texture options
- Modern, minimalist look
- Ability to create unique, custom designs
FAQs
Can microcement be used in a shower?
Yes, microcement can be used in a shower. It is an excellent choice for shower floors, walls, and even ceilings due to its water-resistant properties and seamless finish. When properly installed and sealed, microcement creates a durable and attractive surface that can withstand the daily use of a shower environment.
Is microcement good for showers?
Microcement is indeed good for showers. Its water-resistant nature, durability, and easy maintenance make it an ideal material for wet areas. Additionally, the seamless finish of microcement eliminates grout lines, reducing the potential for mold and mildew growth and making cleaning much easier compared to traditional tiled showers.
What are the essential steps for a successful microcement shower installation?
The essential steps for a successful microcement shower installation include proper substrate preparation, application of multiple layers of microcement, adequate drying time between coats, and thorough sealing. It’s crucial to ensure the substrate is clean, dry, and stable before beginning the application process. Proper sealing is particularly important in shower environments to ensure long-lasting water resistance and durability.
How do you maintain a microcement shower?
Maintaining a microcement shower involves regular cleaning with mild, pH-neutral soap and water. Avoid using abrasive cleaners or scrubbers that could damage the sealer. Wipe down surfaces after each use to prevent water spots and soap scum buildup. Periodically inspect the surface for any signs of wear or damage, and reapply sealer every 2-3 years or as recommended by the manufacturer to maintain optimal performance.
How to clean a microcement shower?
To clean a microcement shower, use a soft cloth or sponge with a mild, pH-neutral soap and warm water. Gently wipe down the surfaces, paying extra attention to areas prone to soap scum or mineral deposits. Rinse thoroughly with clean water and dry with a soft cloth or squeegee to prevent water spots. For tougher stains, use a specialized microcement cleaner, but avoid harsh chemicals or abrasive materials that could damage the sealer.
What are the benefits of using microcement for shower walls and walk-in shower bases?
Using microcement for shower walls and walk-in shower bases offers numerous benefits. The seamless finish creates a sleek, modern look while eliminating grout lines that can harbor mold and mildew. Microcement is highly water-resistant when properly sealed, making it ideal for wet environments. Its durability and ease of maintenance make it a practical choice for high-traffic areas like showers. Additionally, the versatility in color and texture options allows for customized designs that can complement any bathroom style.
