What is a Microcement Vanity?
Microcement vanities are innovative bathroom fixtures that combine style and functionality. These sleek, contemporary vanities are crafted using a thin layer of cement-based material applied over existing surfaces or new structures. The result is a seamless, waterproof, and highly customizable bathroom centerpiece that can transform any space into a modern oasis.
Microcement vanities offer a unique blend of durability and aesthetics, making them an increasingly popular choice for homeowners and designers alike. The versatility of microcement allows for endless design possibilities, from minimalist and industrial looks to more elaborate and textured finishes.
Key features of microcement vanities include:
- Seamless, joint-free surface
- Waterproof and stain-resistant properties
- Customizable colors and textures
- Thin application (2-3mm thickness)
- Suitable for application over existing surfaces
Benefits of Using Microcement in Bathroom Vanities
Microcement vanities offer numerous advantages over traditional bathroom fixtures, making them an excellent choice for modern homes. Let’s explore some of the key benefits:
Versatility in Design
Microcement’s adaptability allows for endless design possibilities. It can be applied to various shapes and sizes, creating unique and personalized vanities that perfectly match your bathroom’s aesthetic. Whether you prefer a sleek, minimalist look or a more textured, industrial feel, microcement can be tailored to your taste.
Durability and Longevity
One of the standout features of microcement vanities is their exceptional durability. The material is highly resistant to cracks, chips, and stains, ensuring that your vanity maintains its pristine appearance for years to come. This longevity makes microcement an excellent investment for homeowners looking for a low-maintenance bathroom solution.
Easy Maintenance
Microcement vanities are incredibly easy to clean and maintain. The seamless surface prevents the accumulation of dirt and grime in hard-to-reach areas, making daily cleaning a breeze. A simple wipe-down with a damp cloth and mild soap is usually sufficient to keep your microcement vanity looking its best.
Waterproof Properties
The waterproof nature of microcement makes it an ideal choice for bathroom vanities. Unlike some traditional materials, microcement is highly resistant to water damage, preventing issues such as warping, swelling, or mold growth. This feature ensures that your vanity remains in top condition even in the humid bathroom environment.
Benefits of microcement vanities:
- Customizable designs and finishes
- Exceptional durability and longevity
- Low maintenance requirements
- Waterproof and moisture-resistant
- Seamless, modern appearance
- Suitable for renovation projects
Popular Designs and Styles for Microcement Vanities
Microcement vanities offer a wide range of design possibilities, allowing homeowners to create unique and stylish bathroom centerpieces. Here are some popular designs and styles that showcase the versatility of microcement:
Minimalist Floating Vanities
Sleek, wall-mounted microcement vanities create a sense of spaciousness and modernity in any bathroom. These floating designs feature clean lines and a seamless appearance, perfect for contemporary and minimalist interiors.
Industrial-Inspired Vanities
Microcement’s raw, concrete-like finish lends itself well to industrial-inspired designs. Pair a microcement vanity with metal accents and exposed plumbing for an edgy, urban look that’s both stylish and functional.
Textured and Patterned Vanities
Microcement can be manipulated to create various textures and patterns, adding visual interest to your vanity. From subtle swirls to more pronounced geometric designs, textured microcement vanities offer a unique and eye-catching focal point for your bathroom.
Integrated Sink Designs
One of the most striking features of microcement vanities is the ability to create seamless, integrated sink designs. These vanities feature a continuous surface that flows seamlessly into the sink, creating a modern and hygienic bathroom fixture.
Popular microcement vanity styles:
- Floating wall-mounted designs
- Industrial-chic vanities with metal accents
- Textured and patterned surfaces
- Integrated sink and countertop designs
- Curved and organic shapes
- Two-tone color combinations
DIY Microcement Vanity: Step-by-Step Guide
Materials Needed for a Microcement Vanity
Before embarking on your DIY microcement vanity project, it’s essential to gather all the necessary materials and tools. Here’s a comprehensive list of what you’ll need:
Base Materials
- Existing vanity structure or new substrate (e.g., MDF, plywood)
- Microcement base coat
- Microcement finishing coat
- Primer (if required for your chosen substrate)
- Fiberglass mesh tape
Tools
- Trowels (various sizes for different application stages)
- Sandpaper (various grits)
- Mixing bucket and drill with mixing attachment
- Measuring tools (tape measure, level)
- Protective gear (gloves, dust mask, safety glasses)
Finishing Materials
- Microcement sealer
- Microcement color pigments (if desired)
- Clean cloths for application and cleanup
Materials checklist:
- Microcement base and finishing coats
- Primer and fiberglass mesh tape
- Trowels and sandpaper
- Mixing equipment
- Protective gear
- Sealer and color pigments
- Cleaning supplies
Preparing the Surface for Microcement Application
Proper surface preparation is crucial for achieving a flawless microcement vanity. Follow these steps to ensure your substrate is ready for application:
Clean and Inspect the Surface
Thoroughly clean the existing vanity or new substrate, removing any dirt, dust, or debris. Inspect the surface for any damage, cracks, or imperfections that need to be addressed before applying microcement.
Repair and Sand
Fill any cracks or holes with an appropriate filler and sand the entire surface to create a smooth base. This step is essential for achieving a seamless finish with your microcement application.
Apply Primer
If required for your chosen substrate, apply a suitable primer to enhance adhesion and create an ideal surface for the microcement. Allow the primer to dry completely according to the manufacturer’s instructions.
Install Fiberglass Mesh
Apply fiberglass mesh tape to any joints or areas prone to movement. This step helps prevent cracking and ensures a durable, long-lasting finish for your microcement vanity.
Surface preparation checklist:
- Clean and inspect the substrate
- Repair any damage and sand the surface
- Apply primer if necessary
- Install fiberglass mesh tape at joints
- Ensure the surface is completely dry before proceeding
Applying Base Coats for a Microcement Vanity
The base coat application is a crucial step in creating a strong foundation for your microcement vanity. Follow these steps for a successful base coat application:
Mix the Base Coat
Prepare the microcement base coat according to the manufacturer’s instructions. Ensure you mix only the amount you can apply within the working time of the product.
Apply the First Base Coat
Using a trowel, apply a thin layer of the base coat to the prepared surface. Work in small sections, ensuring even coverage and smoothing out any imperfections as you go.
Allow to Dry and Sand
Let the first base coat dry completely, then lightly sand the surface to remove any minor imperfections or high spots. Clean off any dust before proceeding.
Apply Additional Base Coats
Repeat the process, applying 2-3 more base coats as needed to achieve the desired thickness and smoothness. Sand lightly between each coat for the best results.
Base coat application tips:
- Mix only what you can apply within the working time
- Apply thin, even layers
- Sand and clean between coats
- Build up thickness gradually with multiple coats
- Ensure each coat is completely dry before applying the next
Decorative Coats for a Microcement Vanity
The decorative coats are where you can truly customize the look of your microcement vanity. Follow these steps to achieve your desired finish:
Choose Your Color and Texture
Decide on the final color and texture you want for your vanity. You can add color pigments to the microcement mixture or apply tinted sealers later for different effects.
Mix the Decorative Coat
Prepare the microcement finishing coat according to the manufacturer’s instructions, incorporating any chosen color pigments if desired.
Apply the Decorative Coat
Using a clean trowel, apply the decorative coat in thin, even layers. Work in small sections, using consistent pressure and movements to achieve the desired texture and finish.
Create Texture or Patterns
If desired, use specialized troweling techniques or tools to create unique textures or patterns in the wet microcement. This step allows for endless customization possibilities.
Allow to Dry and Sand
Let the decorative coat dry completely, then lightly sand the surface to achieve the desired smoothness. Clean off any dust before proceeding to the sealing stage.
Decorative coat application techniques:
- Smooth trowel finish for a sleek look
- Textured finish using specialized trowels or tools
- Two-tone effects by layering different colors
- Patterned designs using stencils or masking techniques
- Polished finish for a high-gloss appearance
Sealing and Protecting Your Microcement Vanity
The final step in creating your DIY microcement vanity is sealing and protecting the surface. This crucial stage ensures the longevity and water resistance of your vanity:
Choose the Right Sealer
Select a high-quality sealer specifically designed for microcement surfaces. Consider factors such as the desired finish (matte, satin, or glossy) and the level of protection needed for a bathroom environment.
Prepare the Surface
Ensure the microcement surface is completely dry, clean, and free of dust or debris before applying the sealer.
Apply the Sealer
Using a clean cloth or roller, apply the sealer in thin, even coats. Work in small sections, following the manufacturer’s instructions for application techniques and drying times.
Apply Multiple Coats
For maximum protection, apply 2-3 coats of sealer, allowing each coat to dry completely before applying the next. This ensures thorough coverage and enhances the water-resistant properties of your microcement vanity.
Allow for Curing
After applying the final coat of sealer, allow the vanity to cure for the recommended time before use. This typically ranges from 24-72 hours, depending on the product used.
Sealing and protection tips:
- Choose a sealer suitable for bathroom environments
- Apply thin, even coats for best results
- Allow proper drying time between coats
- Consider additional protection for high-use areas
- Follow manufacturer’s instructions for curing time
Custom Built Microcement Vanity Ideas 
Bespoke Microcement Vanity Designs
Microcement’s versatility allows for truly unique and personalized vanity designs. Here are some inspiring ideas for custom-built microcement vanities:
Curved and Organic Shapes
Break away from traditional rectangular vanities by incorporating curved or organic shapes. Microcement’s flexibility allows for seamless application on rounded edges and flowing forms, creating a striking and modern bathroom centerpiece.
Multi-Level Vanities
Create visual interest and functionality by designing a multi-level microcement vanity. Incorporate different heights for the countertop, creating distinct zones for sinks, storage, and display areas.
Integrated Storage Solutions
Design a microcement vanity with built-in storage compartments. Seamlessly incorporate open shelving or hidden cabinets into the vanity structure, maintaining a sleek and minimalist appearance while maximizing storage space.
Custom microcement vanity design ideas:
- Asymmetrical layouts for unique visual appeal
- Waterfall edge designs for a luxurious look
- Floating vanities with hidden support structures
- Combination of microcement and other materials (e.g., wood, metal)
- Backlit vanities for ambient lighting effects
Combining Microcement Vanities with Other Bathroom Elements
To create a cohesive and stylish bathroom design, consider how your microcement vanity can complement other elements in the space:
Coordinating with Flooring
Extend the microcement finish to your bathroom floor for a seamless, spa-like atmosphere. Alternatively, choose contrasting flooring materials to make your microcement vanity stand out as a focal point.
Matching Wall Treatments
Create a harmonious look by applying microcement to accent walls or shower enclosures. This continuity in materials can make your bathroom feel more spacious and cohesive.
Complementary Fixtures and Accessories
Select bathroom fixtures and accessories that enhance the aesthetic of your microcement vanity. Consider matte black or brushed metal finishes for a modern, industrial look, or opt for warm metallic tones to add a touch of luxury.
Ways to combine microcement vanities with other elements:
- Coordinated microcement shower walls and vanity
- Contrasting tile backsplash behind the vanity
- Matching microcement sink and vanity design
- Complementary lighting fixtures to enhance the vanity’s appearance
- Coordinated mirror frames or medicine cabinets
Microcement Vanity Color Options
One of the most exciting aspects of designing a microcement vanity is the wide range of color options available. Here are some popular color choices and their effects on bathroom aesthetics:
Neutral Tones
Shades of gray, beige, and white create a timeless and versatile look that can easily adapt to changing design trends. These neutral tones provide a perfect backdrop for colorful accessories or statement pieces in your bathroom.
Bold and Vibrant Colors
For a more daring approach, consider rich, saturated colors like deep blues, forest greens, or even black for a dramatic and luxurious feel. These bold choices can make your microcement vanity a true focal point in the bathroom.
Earth Tones
Warm, earthy hues like terracotta, sand, or soft browns can create a cozy and inviting atmosphere in your bathroom. These colors work particularly well in natural or rustic-inspired design schemes.
Microcement vanity color options:
- Classic white for a clean, fresh look
- Charcoal gray for a modern, sophisticated appearance
- Soft pastels for a calming, spa-like atmosphere
- Two-tone combinations for added visual interest
- Metallic-infused finishes for a touch of glamour
Microcement Vanity Maintenance Tips
Cleaning and Caring for Your Microcement Vanity
Proper maintenance is key to preserving the beauty and longevity of your microcement vanity. Follow these tips for effective cleaning and care:
Daily Cleaning
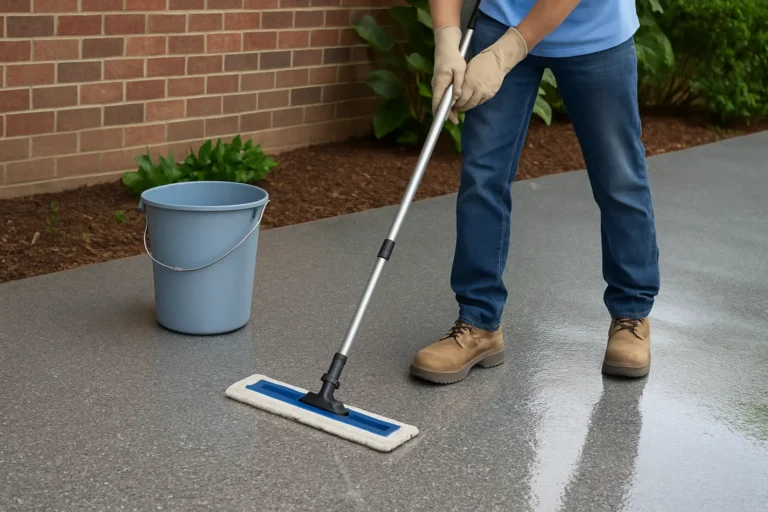
For everyday maintenance, simply wipe down your microcement vanity with a soft, damp cloth. Use mild, pH-neutral soap if needed, and avoid harsh or abrasive cleaning products that could damage the sealer or surface.
Dealing with Stains
Address spills and stains promptly to prevent them from setting into the microcement. For tougher stains, use a specialized microcement cleaner recommended by the manufacturer.
Periodic Deep Cleaning
Perform a thorough cleaning of your microcement vanity every few months using a gentle, pH-neutral cleaner specifically designed for microcement surfaces. This helps maintain the vanity’s appearance and protective properties.
Microcement vanity maintenance checklist: Microcement brands compared Different companies make microcement with their own special recipes some are stronger while others look nicer when applied to floors and walls Microcement installation complexity Putting microcement on floors and walls can be tricky because it needs special tools and skills to make it look smooth and even workers have to be careful and follow steps exactly to get it right
Microcement tiles longevity Microcement tiles can last for many years if they are properly installed and maintained They are durable and resistant to wear making them a long-lasting option for floors and walls Dubai cultural spaces microcement is a special material used to make floors and walls look smooth in places where people learn about Dubai’s culture It helps create a modern look while still respecting the traditional feel of these important spaces
Microcement units transform boutiques by giving stores a sleek modern look The smooth surfaces and custom colors of microcement make shops stand out Sleek gallery surfaces make art displays look smooth and modern They help paintings and sculptures stand out in museums and art shows
Modern microcement interiors offer sleek and seamless surfaces for walls and floors They create a smooth and contemporary look in homes and buildings Sleek microcement surfaces are smooth and modern-looking floors or walls They are made by applying thin layers of special cement to create a seamless and stylish finish
- Daily wiping with a soft, damp cloth
- Use of mild, pH-neutral soap for regular cleaning
- Prompt addressing of spills and stains
- Periodic deep cleaning with specialized products
- Avoid abrasive cleaners or scrubbing tools
Common Issues and How to Fix Them
While microcement vanities are generally low-maintenance, some issues may arise over time. Here’s how to address common problems:
Minor Scratches
For small surface scratches, gently sand the affected area with fine-grit sandpaper, then apply a thin layer of sealer to restore the finish. For deeper scratches, consult a professional for repair options.
Sealer Wear
If you notice the sealer beginning to wear in high-use areas, consider reapplying a fresh coat of sealer to maintain protection. Follow the manufacturer’s instructions for proper application and curing times.
Cracks or Chips
Small cracks or chips can often be repaired using a microcement repair kit. For larger issues, it’s best to consult a professional to ensure proper repair and prevent further damage.
Troubleshooting microcement vanity issues:
- Regular inspection for signs of wear or damage
- Prompt addressing of minor issues to prevent escalation
- Use of appropriate repair products and techniques
- Professional consultation for significant damage or repairs
Frequently Asked Questions (FAQs)
What are the advantages of a microcement vanity over traditional materials?
Microcement vanities offer several advantages over traditional materials like porcelain or natural stone. They provide a seamless, modern appearance without joints or grout lines, making them easier to clean and maintain. Microcement is also highly customizable in terms of color and texture, allowing for unique design possibilities. Additionally, its thin application makes it ideal for renovations, as it can be applied over existing surfaces without the need for demolition.
How long does it take to install a microcement vanity?
The installation time for a microcement vanity can vary depending on the size of the project and the number of coats required. Typically, the process takes 3-5 days from start to finish. This includes surface preparation, application of base coats, decorative coats, and sealing. It’s important to allow sufficient drying time between coats and a proper curing period after sealing to ensure the best results and longevity of your microcement vanity.
Can I customize the color and texture of my microcement vanity ?
Yes, one of the main advantages of microcement vanities is their high level of customization. You can choose from a wide range of colors, from neutral tones to bold hues, to match your bathroom’s aesthetic. Texture options are also diverse, ranging from smooth and polished to more rustic and industrial finishes. This flexibility allows you to create a truly unique vanity that perfectly complements your bathroom design.
Is a microcement vanity durable and long-lasting?
Microcement vanities are known for their durability and longevity when properly installed and maintained. The material is resistant to cracks, chips, and stains, making it an excellent choice for high-traffic bathroom areas. With proper sealing, microcement vanities are also water-resistant and can withstand daily use in humid environments. Regular maintenance and periodic resealing can help ensure your microcement vanity remains beautiful and functional for many years.
How do I maintain the finish of my microcement vanity?
Maintaining the finish of your microcement vanity is relatively simple. For daily cleaning, use a soft, damp cloth with mild, pH-neutral soap to wipe down the surface. Avoid harsh or abrasive cleaners that could damage the sealer. Address spills promptly to prevent staining, and perform periodic deep cleaning with specialized microcement cleaners. It’s also important to reseal the surface every few years or as recommended by the manufacturer to maintain its protective properties and appearance.
