What is broom finished concrete?
Broom finished concrete is a popular texturing technique used to create a non-slip surface on concrete driveways, patios, and pool decks. This method involves dragging a specialized broom across freshly poured concrete to create a series of parallel lines or patterns. The result is a textured surface that provides excellent traction and a unique aesthetic appeal.
Benefits of broom finished concrete
Broom finished concrete offers several advantages for outdoor surfaces:
- Improved slip resistance, especially when wet
- Enhanced durability and longevity
- Cost-effective compared to other decorative finishes
- Easy maintenance and cleaning
- Versatile application for various outdoor spaces
Popular applications for broom finished surfaces
Broom finished concrete is widely used in:
- Residential driveways
- Commercial parking lots
- Sidewalks and walkways
- Pool decks and patios
- Garage floors
| Application | Benefits |
| Driveways | Increased traction for vehicles |
| Pool decks | Slip resistance for wet areas |
| Patios | Aesthetic appeal and durability |
Preparing for Your Broom Finish Concrete Project
Site evaluation and planning
Before starting your broom finish concrete project, it’s crucial to evaluate the site and plan accordingly. Consider factors such as:
- Soil conditions and drainage
- Existing structures or vegetation
- Desired dimensions and layout
- Local building codes and permits
Gathering necessary tools and materials
To create a broom finish concrete surface, you’ll need the following tools and materials:
- Concrete mix
- Reinforcement materials (rebar or wire mesh)
- Forming boards and stakes
- Concrete finishing tools (float, trowel, edger)
- Specialized concrete broom
- Safety equipment
Safety considerations
Prioritize safety throughout your project by:
- Wearing appropriate personal protective equipment (PPE)
- Following proper lifting techniques
- Ensuring proper ventilation when working with concrete
- Keeping the work area clean and organized
Step-by-Step Guide to Creating a Broom Finish Concrete Surface 
Excavation and base preparation
- Mark the area for your concrete surface
- Excavate to the required depth, typically 4-6 inches for residential applications
- Compact the soil and add a layer of gravel for improved drainage
Forming and reinforcement
- Install forming boards around the perimeter of the area
- Add reinforcement materials (rebar or wire mesh) to strengthen the concrete
- Ensure proper spacing and support for the reinforcement
Mixing and pouring concrete
- Calculate the amount of concrete needed for your project
- Mix the concrete according to manufacturer’s instructions
- Pour the concrete into the prepared area, starting from one corner
Screeding and floating
- Use a screed board to level the concrete surface
- Allow the concrete to set slightly before floating
- Use a bull float to smooth the surface and remove any imperfections
Applying the broom finish technique
- Wait for the concrete to reach the right consistency (when water has risen to the surface)
- Start at one edge and drag the broom across the surface in straight lines
- Maintain consistent pressure and direction for an even finish
Enhancing Your Broom Finish Concrete Project
Color options for broom finished concrete
Add visual interest to your broom finished concrete by incorporating color:
- Integral color mixed into the concrete
- Color hardeners applied to the surface
- Stains or dyes applied after curing
Decorative borders and patterns
Enhance the aesthetics of your broom finished surface with:
- Stamped or stenciled borders
- Contrasting color bands
- Geometric patterns created with different broom directions
Sealing and protecting your broom finished surface
Apply a high-quality sealer to:
- Enhance color and appearance
- Protect against stains and weathering
- Increase durability and longevity
Maintaining Your Broom Finish Concrete Driveway, Patio, or Pool Deck 
Regular cleaning and care
Keep your broom finished concrete looking its best by:
- Sweeping or blowing debris regularly
- Washing with mild detergent and water as needed
- Avoiding harsh chemicals or abrasive cleaning methods
Addressing cracks and damage
Promptly repair any cracks or damage to prevent further deterioration:
- Clean the affected area thoroughly
- Apply an appropriate concrete patching compound
- Match the broom finish texture on repaired areas
Resealing and long-term maintenance
To maintain the quality of your broom finished concrete:
- Reseal every 2-3 years or as recommended by the sealer manufacturer
- Inspect regularly for signs of wear or damage
- Address any issues promptly to extend the life of your concrete surface
Comparing Broom Finish to Other Concrete Finishes
Smooth troweled finish
Smooth troweled concrete offers:
- A sleek, modern appearance
- Easier to clean but less slip-resistant
- Suitable for indoor applications
Stamped concrete
Stamped concrete provides:
- A wide range of pattern and texture options
- Higher cost due to specialized tools and labor
- More complex installation process
Exposed aggregate
Exposed aggregate finish features: Quartz flooring installation Exterior concrete coloring adds vibrant hues to outdoor surfaces
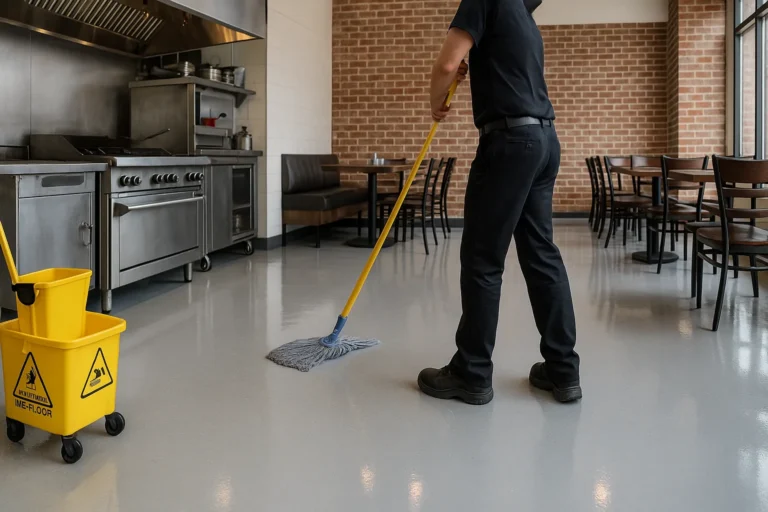
Durable restaurant floors are tough and long-lasting surfaces that can handle lots of people walking on them every day Concrete walls installation involves building strong barriers using a mixture of cement sand and water Skilled workers pour this mixture into forms to create solid walls for buildings and structures
Self leveling flooring preparation involves cleaning and smoothing the surface before applying a special liquid mixture that spreads evenly to create a flat floor Top concrete sealers protect and enhance concrete surfaces They make floors and driveways last longer and look better
Colored villa walkways make homes look pretty and fun They use bright paints to create paths that catch your eye Restaurant patio beautification makes outdoor eating areas look pretty and inviting
Concrete salon entryways make a strong first impression for customers They can be designed in many styles to match the salon’s look Concrete storefront aesthetics
Resurfacing villa concrete makes old concrete look new again by adding a fresh layer on top It can fix cracks and give your villa a clean updated appearance Artistic concrete courtyards
Elegant concrete entryways make your home look fancy and special They are strong and beautiful ways to welcome people into your house Polished concrete luxury brings a sleek and modern look to floors and surfaces It combines the strength of concrete with a smooth shiny finish for a high-end appearance
Stamped concrete innovations are new ways to make concrete look like other materials such as brick or stone Salons restaurants safety means keeping places where people eat clean and free from germs Workers must wash hands and use gloves when handling food to protect customers from getting sick
Concrete floors hospitality hues are warm and inviting colors used in hotels and restaurants to make guests feel welcome Artistic concrete finishes make plain concrete look beautiful and unique
Fireproof kitchen flooring is a special type of floor that doesn’t catch fire easily It helps keep your kitchen safe if something hot spills or if there’s an accident with flames Acrylic floor protection helps keep floors safe from scratches and damage It is a clear coating that makes floors last longer and look better
- A unique, textured appearance
- Excellent slip resistance
- Higher maintenance requirements
| Finish Type | Slip Resistance | Cost | Maintenance |
| Broom | High | Low | Low |
| Smooth | Low | Low | Low |
| Stamped | Medium | High | Medium |
| Exposed | High | Medium | High |
Cost Considerations for Broom Finish Concrete Projects
Factors affecting pricing
The cost of a broom finish concrete project depends on:
- Size of the area
- Concrete mix and reinforcement materials
- Labor costs (if hiring professionals)
- Additional features like color or decorative elements
DIY vs. professional installation
Consider the pros and cons of DIY versus professional installation:
DIY:
- Lower overall cost
- Requires specialized knowledge and skills
- Time-consuming for inexperienced homeowners
Professional:
- Higher upfront cost
- Expertise and quality assurance
- Faster completion and warranty options
According to Duraamen, a leading concrete solutions provider, professional installation of broom finish concrete typically ranges from to 2 per square foot, depending on the factors mentioned above.
FAQs
What makes broom finish concrete different from other concrete finishes?
Broom finish concrete is characterized by its textured surface created by dragging a specialized broom across freshly poured concrete. This technique results in a series of parallel lines that provide excellent slip resistance and a unique aesthetic appeal. Unlike smooth or stamped finishes, broom finished concrete offers a balance of functionality and simplicity.
How long does it take to complete a broom finish concrete driveway, patio, or pool deck?
The time required to complete a broom finish concrete project depends on various factors, including the size of the area and weather conditions. Typically, the process takes 2-3 days for smaller projects and up to a week for larger areas. This timeline includes site preparation, concrete pouring, finishing, and initial curing.
Can I apply a broom finish to existing concrete surfaces?
Applying a broom finish to existing concrete surfaces is challenging and not recommended. The broom finish technique requires freshly poured concrete that hasn’t yet set. For existing surfaces, consider alternative methods like concrete overlays or resurfacing products that can provide a similar texture and appearance.
What are the best tools for creating a broom finish on concrete?
The most important tool for creating a broom finish is a specialized concrete broom. These brooms typically have stiff bristles and come in various widths to suit different project sizes. Other essential tools include a bull float for smoothing the surface before brooming, and an edger to create clean, finished edges along the perimeter of the concrete.
How does weather affect the installation of broom finish concrete?
Weather plays a crucial role in the installation of broom finish concrete. Ideal conditions include temperatures between 50-80°F (10-27°C) with overcast skies and low humidity. Extreme heat can cause the concrete to set too quickly, making it difficult to achieve a consistent broom finish. Cold temperatures or rain can slow down the curing process and potentially damage the surface.
Is broom finish concrete slip-resistant?
Yes, broom finish concrete is highly slip-resistant. The textured surface created by the brooming technique provides excellent traction, even when wet. This makes it an ideal choice for outdoor areas like driveways, patios, and pool decks where safety is a primary concern.
Can I customize the look of my broom finish concrete surface?
Absolutely! While the basic broom finish technique creates a uniform texture, you can customize the look by varying the direction of the broom strokes or creating patterns. Additionally, you can incorporate color through integral pigments, color hardeners, or stains to further enhance the appearance of your concrete surface.
How often should I reseal my broom finish concrete driveway, patio, or pool deck?
The frequency of resealing depends on factors such as climate, usage, and the type of sealer used. Generally, it’s recommended to reseal broom finish concrete every 2-3 years. However, high-traffic areas or surfaces exposed to harsh weather conditions may require more frequent resealing. Regular inspections can help determine when resealing is necessary to maintain the surface’s appearance and protection.
